2018 Feb 14
#coding
#pm
#tutorials
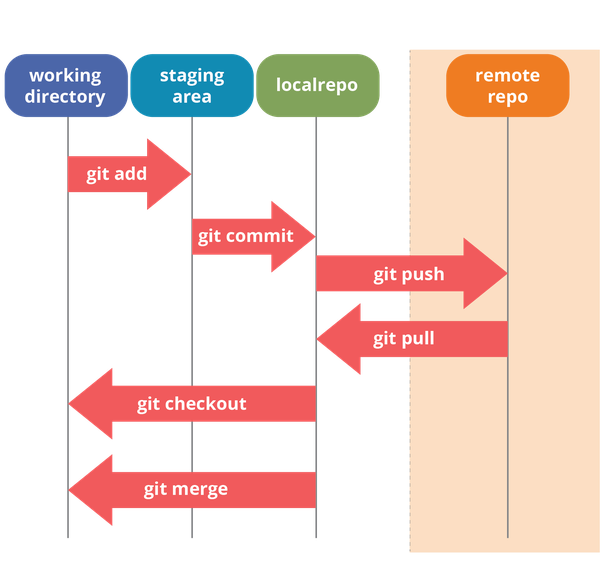
Git is an actively maintained, free and open source, distributed version control system originally developed in 2005 by Linus Torvalds (Linux). Distributed version control systems help software development teams collaborate on projects' source code by maintaining a full history of file changes across a decentralized file system. The distributed architecture maintains a full history of all changes in every developer's local working directory, aka repository. Redundancy. Git is flexible. Git works across all platforms, supports branching and tagging as first class citizens and operations within, such as merging or reverting.
Open sites such as GitHub or GitLab are fantastic for hosting projects for the open-source community. Further, these sites are becoming resumes of people's coding capabilities. Active GitHub collaborators are often recruited by job hunters. That could be you.
This section will introduce GitHub basics, deeper resources, and how to install Git on your machine and interact with Git Repositories via command prompt.
git init
A great starting point would be to create a free account on a Git-based development platform. This little tutorial will use GitHub. Setup a free account there. For reference, this is my GitHub page.
Next follow this quick guide. In five minutes you will have the grasp of the basics of GitHub.
- Create a repository. A respository is used to organize files of a single project.
- Create a branch. Branching is a way to work on different versions of a project simultaneously.
- Make and commit changes. Make file edits and save them to the repository.
- Open a pull request. Ask a contributor to review changes within a branch for merging to the main, or master, branch.
- Merge your pull request. Combine changes within a version branch to files of the master branch.
For Git collaboration independent of sites such as GitHub and/ or to access files, make edits and commits, branches, etc from a command prompt you need to install Git on your computer. Using command prompt may be a little overwhelming for first timers but it ultimately makes the whole process of collaborating via Git significantly simpler. You can follow the instructions on this page to install Git on your preferred operating system.
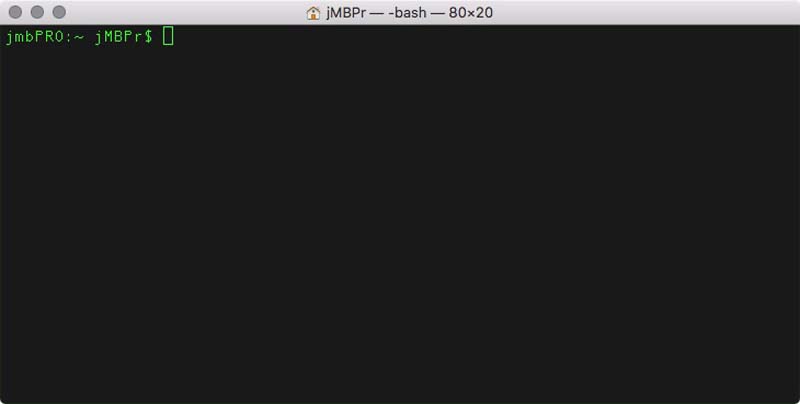
To install Git on a Mac, launch "Terminal". This application is installed on all Macs.
First install Homebrew by copying this command into your terminal window and hit return.
ruby -e "$(curl -fsSL https://raw.githubusercontent.com/Homebrew/install/master/install)"
Now install Git with the following command in your Terminal window.
brew install git
jmbPRO:~ jMBPr$ brew install git
==> Downloading https://homebrew.bintray.com/bottles/git-2.16.1.high_sierra.bottle.tar.gz
######################################################################## 100.0%
==> Pouring git-2.16.1.high_sierra.bottle.tar.gz
==> Caveats
Bash completion has been installed to:
/usr/local/etc/bash_completion.d

zsh completions and functions have been installed to:
/usr/local/share/zsh/site-functions

Emacs Lisp files have been installed to:
/usr/local/share/emacs/site-lisp/git
==> Summary
🍺  /usr/local/Cellar/git/2.16.1: 1,495 files, 34.5MB
You can check if the install was successful with the following command. If a version number is read back, Git is installed.
git --version
jmbPRO:~ jMBPr$ git --version
git version 2.16.1
With Git as your new friend, it would be prudent to introduce yourself. This way future collaborators know when you make what contributions.
git config --global user.name "your name comes here"
git config --global user.email [email protected]
Next, you may connect with GitHub via SSH. The Secure Shell (SSH) protocol connects and authenticates your computer with remote servers and services. In effect, you can save yourself effort in having to supply your GitHub username and password every time you access a GitHub repository. Follow this guide.
- Check for existing SSH keys or...
- Generate a new key and add it to your ssh-agent. *see next paragraph.
- Add your SSH key to your Github account.
- Test your SSH connection.
When confronted with setting up a basic SSH config file, you can directly do so in Terminal using the Nano editor. Control+O to save your file. Control+X to quit Nano.
nano ~/.ssh/config
Now that you have a GitHub account and a Git client installed on your machine, it is time to practice. This Quora entry is a great resource to get you going. Or, you can use this page...
Say you know of an interesting project on GitHub, how can you join the development using your Git client? Find the repository online and setup a local directory you plan to store the repository. Any directory, anywhere. (These instructions assume Terminal.) Point Terminal to your directory by typing "cd " and then the directory path, or you can drag the folder into the Terminal window and it will automate the path.
cd myDirectory/path/here
In GitHub click on the green Clone or download button. Copy the web address.
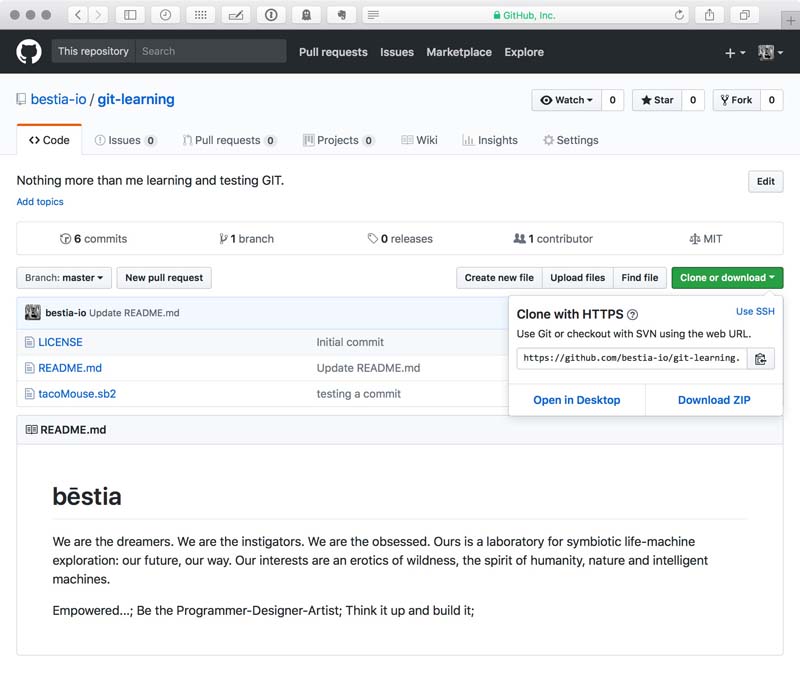
Now in Terminal, within your intended directory, type the following command and paste the web address from GitHub.
git clone pastedWebAddress
All the files and folder structure will be downloaded into your directory and this will initialize as a local repository. Changes made here can be synced back to to the remote repository. Or, you can keep the files as is and pull future updates from the remote repository.
Assume you have taken some time to make critical changes to some files within your project. All your work is stored on your local repository which is inaccessible to your collaborators. So, it is time to add your changes to the remote repository, sharing with everyone. First check your repository against the remote repository.
git status
This will give you a list of discrepencies between the remote repository and your own. If there are differences, say another person added some things since the last time you updated your local repository, you will want to reconcile those changes with your own before adding your own files remotely.
git pull
Git will tell you line by line, file by file what differences there are between your copy and the remote repository. Now is the time you reconcile those differences. After editing your files, if necessary, you can add all your new stuff with this command. The dot after add means add all your changes. You can replace the dot with a specific file name if you only want to add one thing at a time.
git add .
However, your files are not quite added to the remote repository yet. Next you will stage your changes.
git commit -m "Write a detailed, brief comment about your changes here"
Finally, upload your changes to the remote server.
git push
Now your collaborators will see your changes the next time they visit GitHub, check the status or pull!
Another way to work with Git is via branches. By creating a branch, you can make all sorts of changes freely without worry of destructing the master files. You may, for instance, want to add a feature but you're not sure how it might effect the operability of the overall project. Start by perfecting your new feature in a branch before merging those changes back to the main working group of files, or master branch. First, make a new branch. In this example, we will call it bestia-one.
git branch bestia-one
Now confirm which branch is active on your machine.
git branch
You will see a list of all working branches in your project. The active branch on your machine will have an asterick.
*master
bestia-one
experimental-feature
To change the active branch so you can go to work.
git checkout bestia-one
Now you work a while and perfect your new feature. After some time, you are ready to integrate your changes to the master branch. First change your working branch back to the master branch and double check it has been done.
git checkout master
git branch
Now you can merge the two branches. Again, Git will attempt to resolve all the differences and any place it cannot do so will be labeled for you: file by file, line by line. Finally, push your changes to the remote repository.
git merge bestia-one
git pull
git commit -m "added a fantastic new feature!"
git push
There are many ways to use Git, so git to it.
I will post links to resources I have found helpful here.
- Basic GIT tutorial : Stripped down Git tutorial I used to get going.
- Learn Git : Loads of background information about Git, version control, installation and user tutorials.
- FabLabs.io : Social network for fablab members.
- FabLab Git : FabLab Git projects.
- Install Git : Linux, Windows, Mac.
- Connecting to GitHub with SSH : Streamline your command line interface.
- Using Git with Terminal : Breakdown of Git on Macs.
- Terminal Cheatsheet for Mac (Basics) : Great resource!
Share this post...
« Previous post :: Inventory
Following is a list of prices and quantities for the second prototype Pure Imagination build. Many of the materials, ie. acrylic, electronics were donated to the project from the fablab, others as part of the Fab Academy inventory/ session resources. For those materials, I checked online sources. The most expensive parts of the build are the chemical components and, shockingly, the silicone for the concrete mold. The silicone mold survives however, and that price would "decrease" with each successive cast. The bioelectrochemical system needs to be optimized for electricity output and material cost, perhaps alternative materials could be found for...
Next post :: Environmental monitoring with online data logging to Thingsv »
Over the past few months, I have continued to develop the electronics and programming aspects of this project. I now have a system for evualating power potential and environmental sensing, and logging all that data online to Things Speak, an open Internet of Things Platform. Previous to using Things Speak, I was logging data to an SD card. However, with an SD card, I need to periodically pull the data from the card. Extra work. Using Things Speak, the data is available to me and everyone else instantly, everywhere. There have been some issues with wifi stability and internet connectivity...