2017 Mar 01
#model3d
#print3d
#addFab
I am forever in awe of math derived computer geometries. I would love to learn how to write scripts that generate models in a CAD application soon. For the first draft, I decided it would be much faster to sketch a model based on visual cues and test it in a 3D printer.
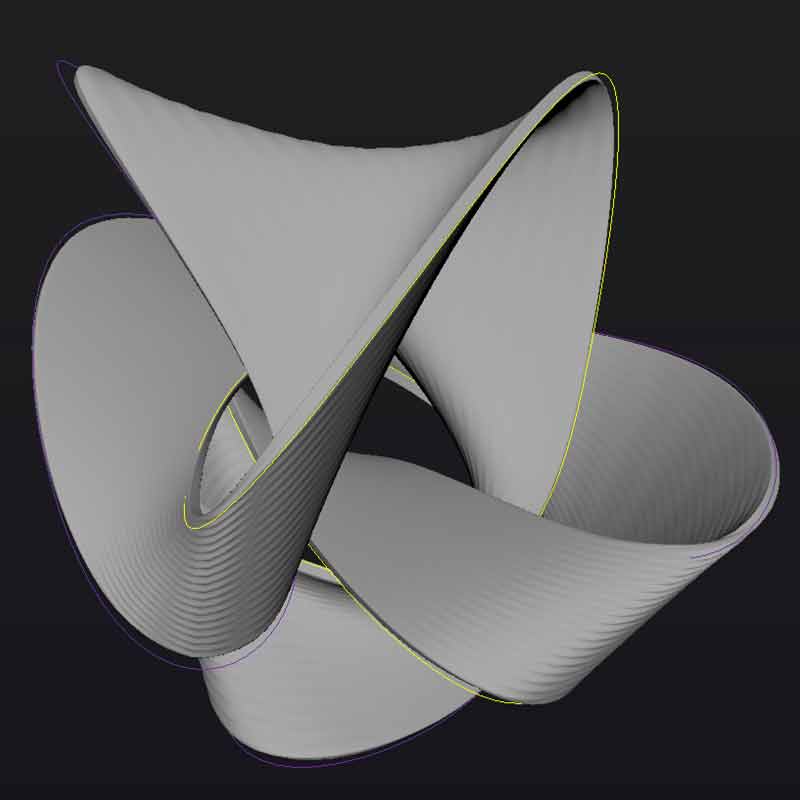
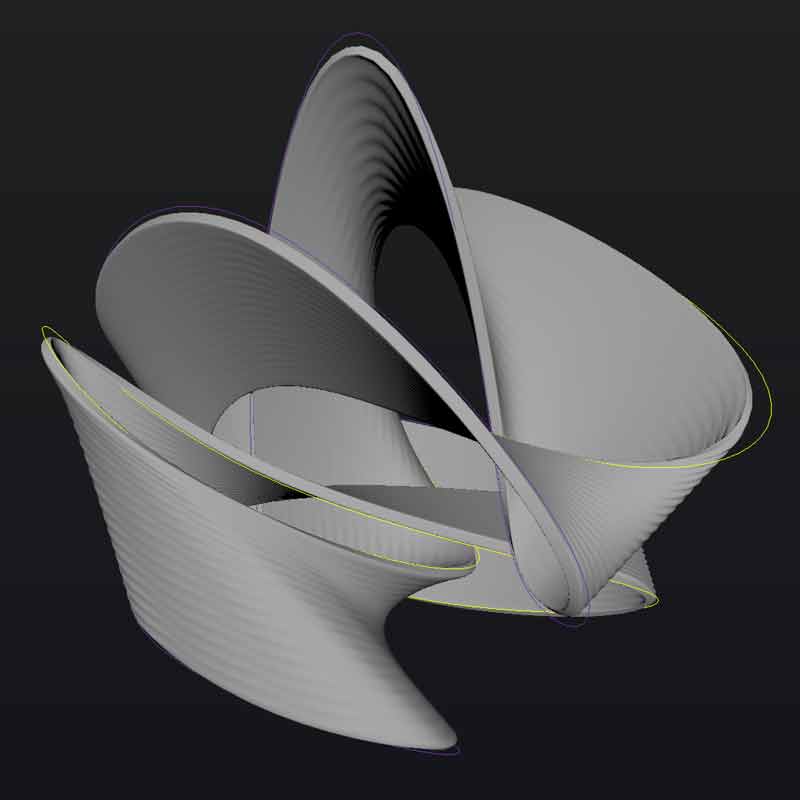
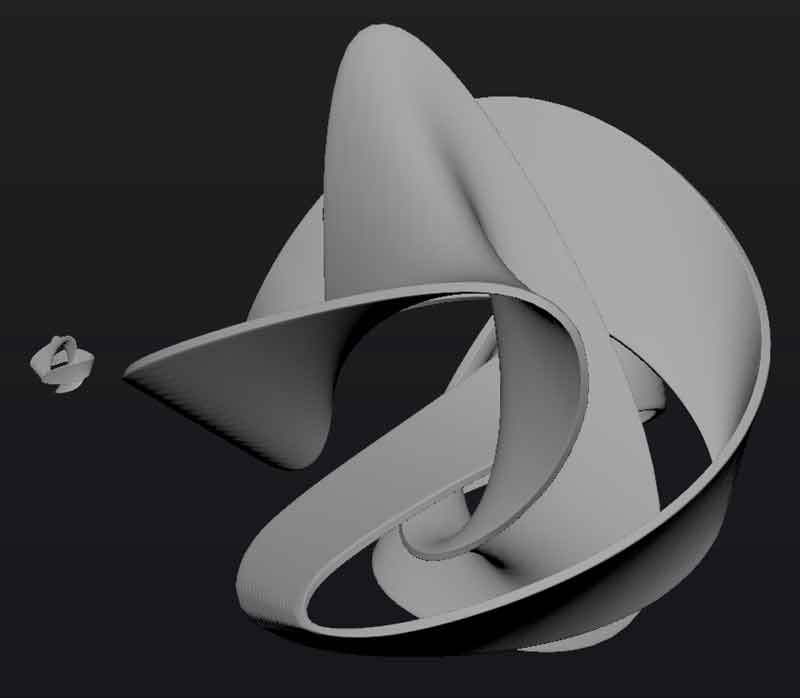
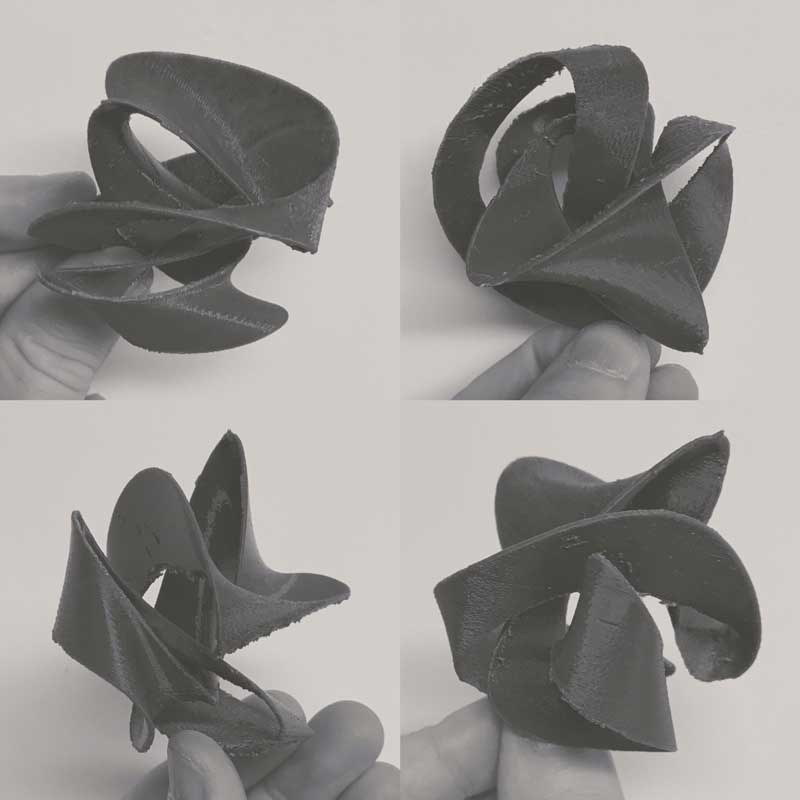
I used Autodesk Maya for this sketch. This little thing fits within a 35mm radius sphere. I am trying to push the tolerances of machine to an extreme here. The first pass I will try 1.2mm wall thickness with some temporary scaffolding.
I am forever in awe of math derived computer geometries. I would love to learn how to write scripts that generate models in a CAD application soon. For the first draft, I decided it would be much faster to sketch a model based on visual cues and test it in a 3D printer.
I used Autodesk Maya for this sketch. This little thing fits within a 35mm radius sphere. I am trying to push the tolerances of machine to an extreme here. The first pass I will try 1.2mm wall thickness with some temporary scaffolding.
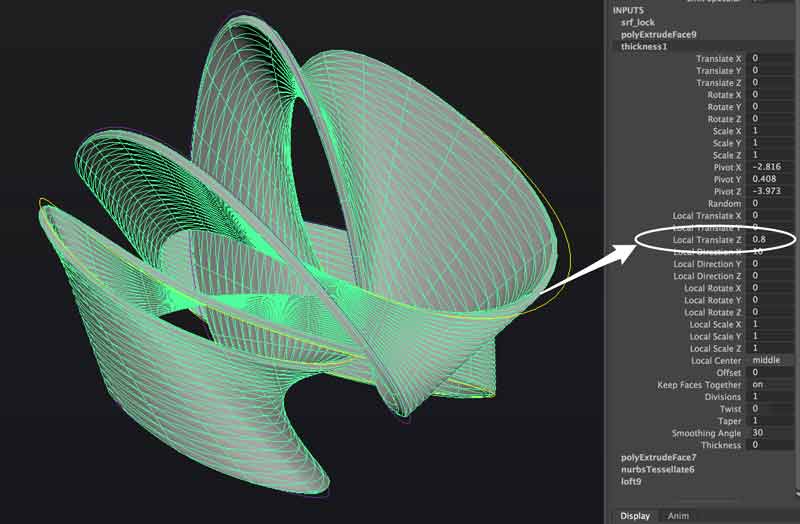
The relationships are parametric based on two closed curves and a thickness variable.

Prior to attempting the first print, I would describe my state-of-mind as nervous. I know that there are some long bridges and extreme angles that will test the machine. Further, I worry that the Makerbot's scaffolding solution leaves too much residue because the connection is overly strong. First, I am going to explore some alternative slicing applications.
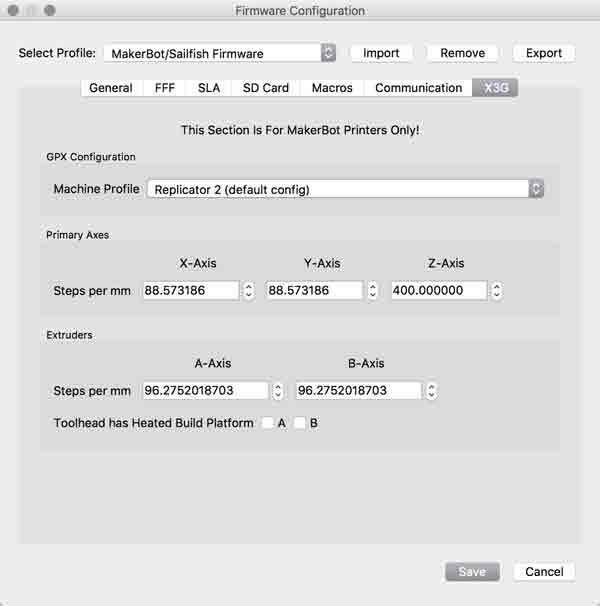
Slicers. While using MakerBot Print for the test print, I sensed limitations in its capability and became curious aobut other applications. After researching online, I found praise for Craftware and Simplify3D. Craftware is free, while Simplify 3D is pay to play following a two week trial period. Starting with Craftware, I was unable to synchronize the application with our lab's Makerbot Replicator 2. Simplify3D conversely made synchronizing with our 3D printer simple. The application prompts for the printer id on first use or from the Tools > Firmware configuration menu, your printer can be selected.
STL files do not store measurements. Oddly, any model imported as STL or OBJ format from Maya is 10% its size. This was the case with all of the slicers I tried. Simple fix, I setup a parameter to scale a duplicate of the object a factor of ten and re-exported from Maya. Further, I orientated the model so the greatest amount of its surface would be anchored to the bed.
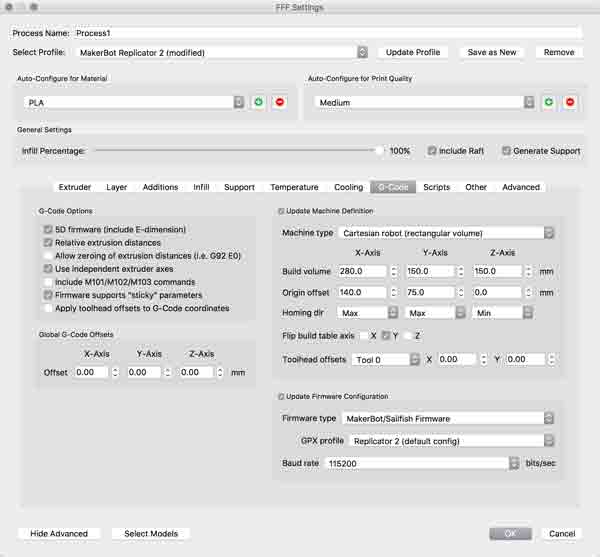
For this first attempt, I kept the default settings with some data from our test prints. The test print had no problem with a 45 degree overhang and also required more time for drying in tiny layers. One advantage of Simplify3D is that it slows the printer in smaller layers or is capable of setting different rules for different zones of the object. Following are screenshots of settings I am monitoring.
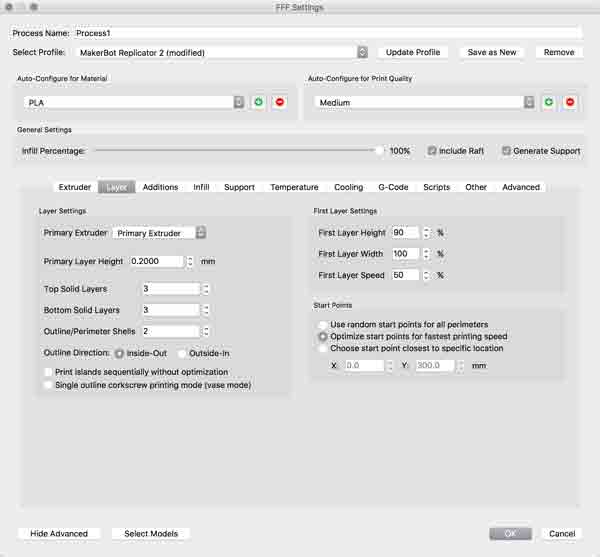
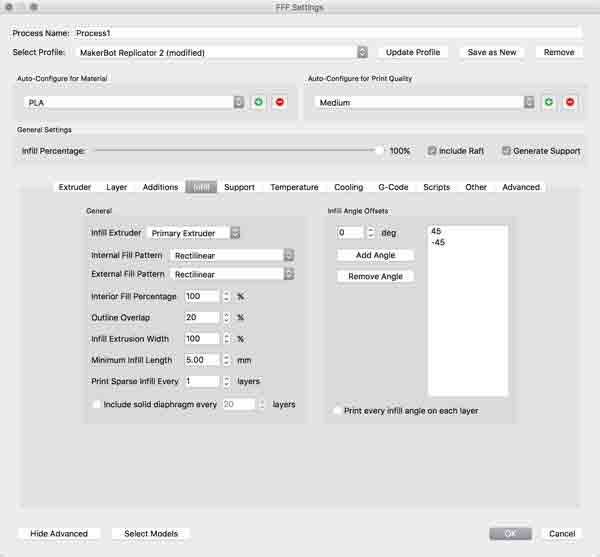
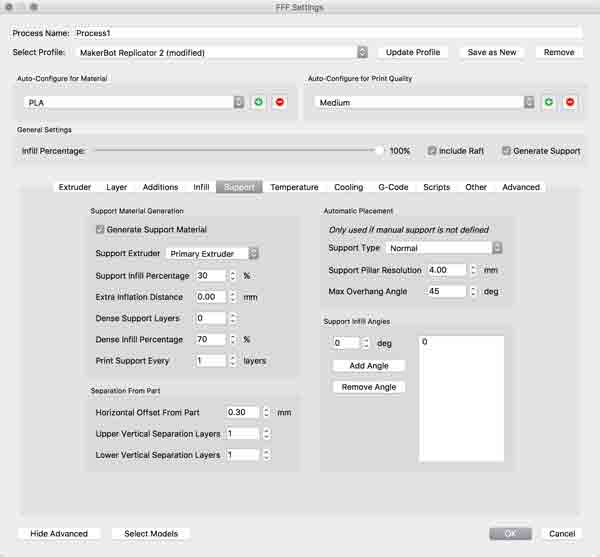
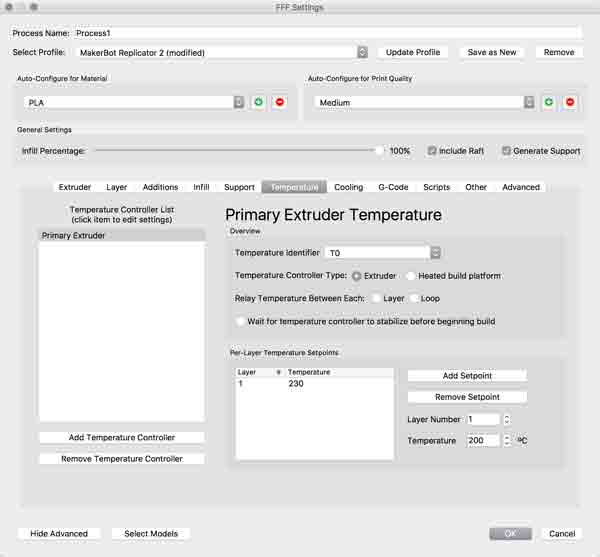
Ensure this information is adjusted for your 3D printer.
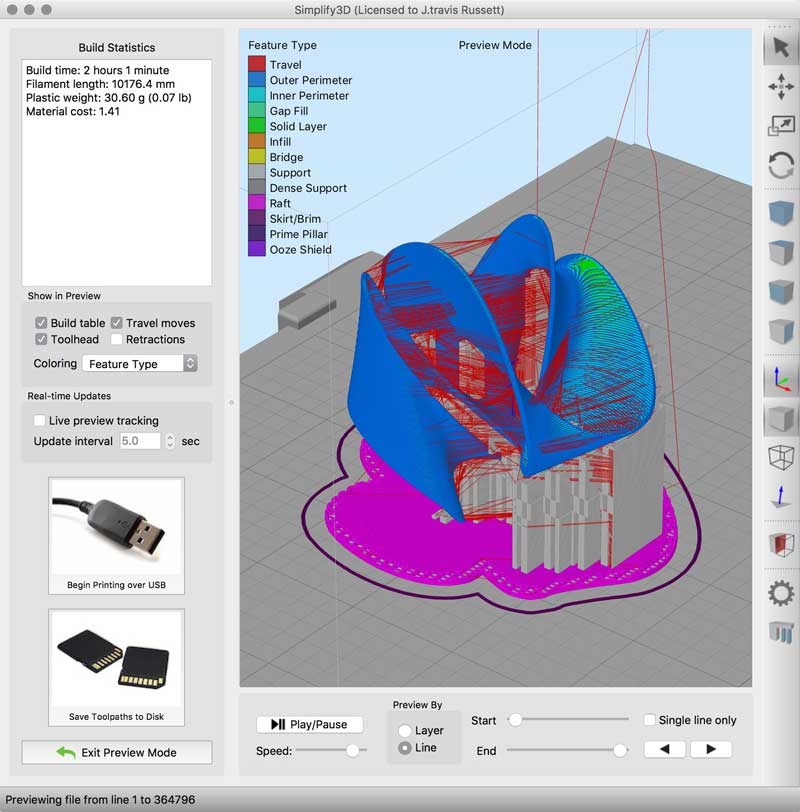
This visual breakdowns the components of the print. My biggest concern is the amount of support Simplify3D is adding. Frankly, I might have tried doing a separate print with the application to test the detachability of its rafting and scaffolding. I thought because this print was small and relatively brief, it may be in itself an adequate test (this print is projected for half the time of our test model). Simplify3D has extensive support options: distance from the model surface, size, density. Plus, you can delete individual pieces. I expect these capabilities will be useful as I have more experience.
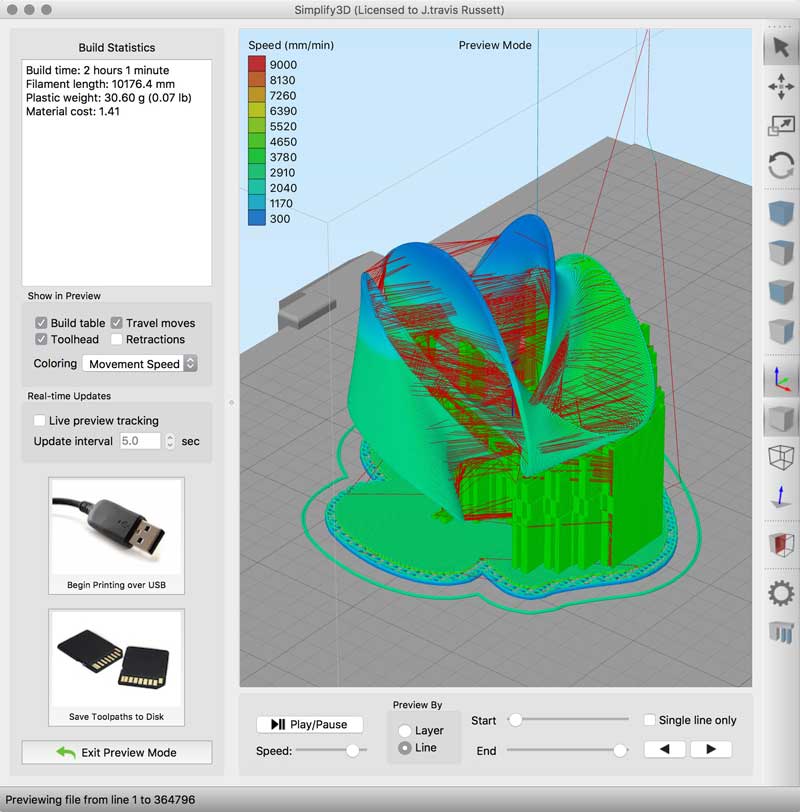
This visual displays variance in printing speed.
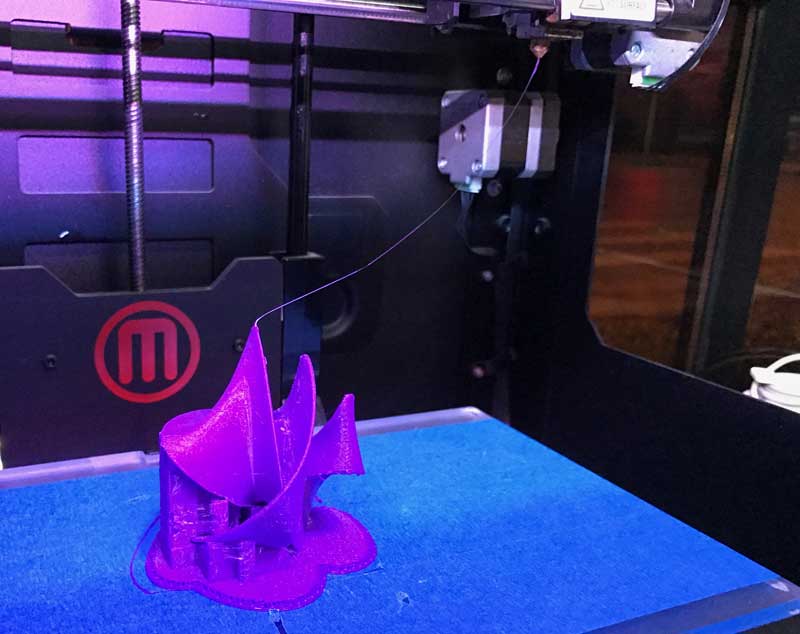
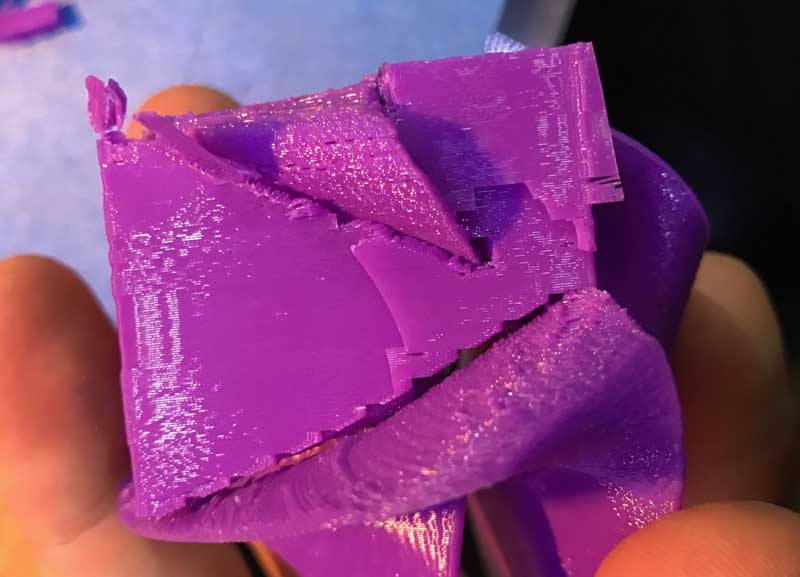
The first print came out nicely, if not a little rough around some edges. The software time estimate of just over two hours was nearly an hour short of the actual printing time, just over three hours.
Printing with 0.20mm layer height, makerBot achieved some remarkable cantilevers.
Slowing down near the peaks preserved their quality in line with the CAD file.
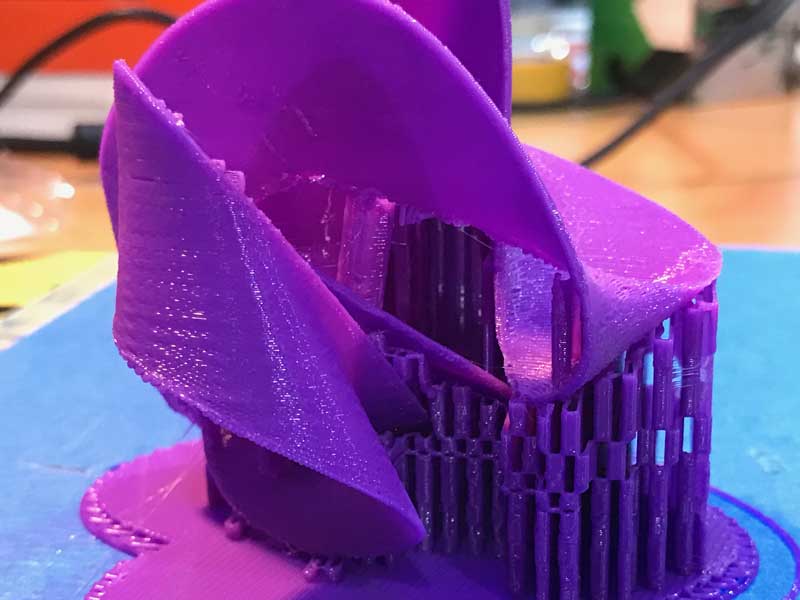
The scaffolding and raft produced by Simplify3D are significantly better than what was produced by MakerBot Print in the previous tests. Each only gently adhered to most surfaces and rarely left residue when removing. The Simplify3D raft by comparison to the makerBot Print raft is thinner and easily bendable, which helps to pop it off.
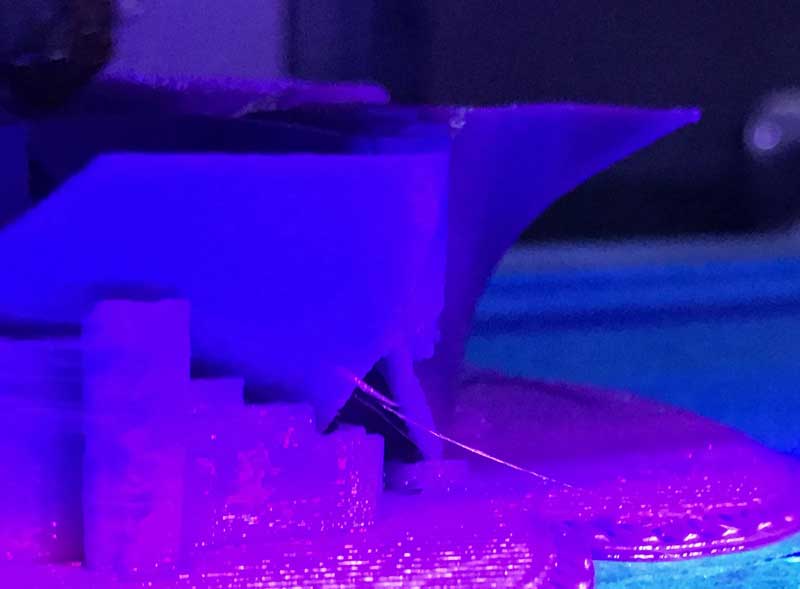
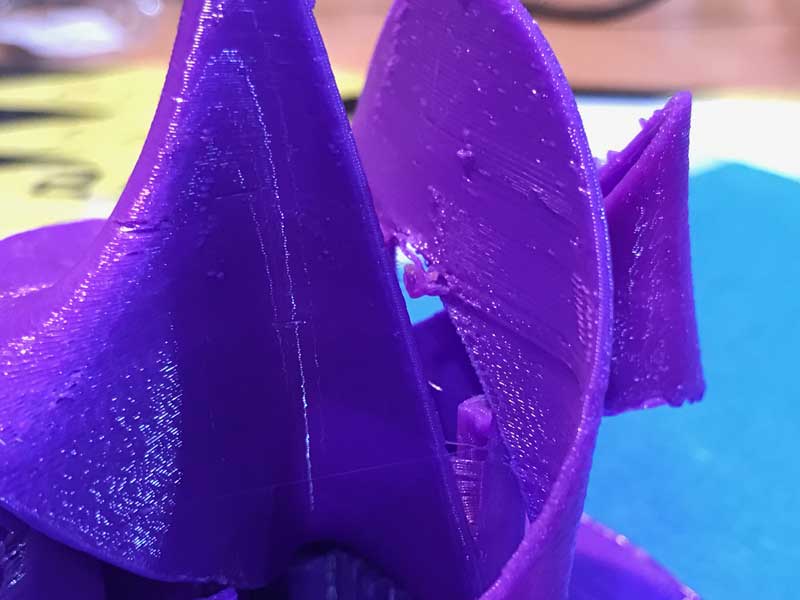
Some of the overhangs delaminated. I can specify the printer to slow down in the specific slices at these spots, add structure, adjust the orientation of the model, decrease the 0.20mm layer height (maybe only specifically in these zones) or modify the mesh with extra material to be cut away post print. It is not difficult to clean up an edges with sandpaper, provided it is reachable. After printing, I read checking the refraction speed is another way to get better edges. Refraction speed is the speed in which filament retracts when the printer comes to an edge.
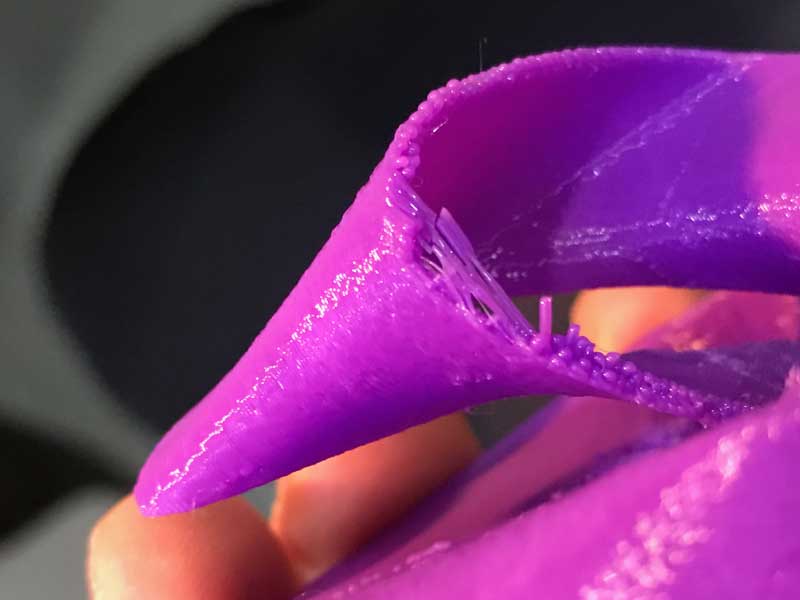
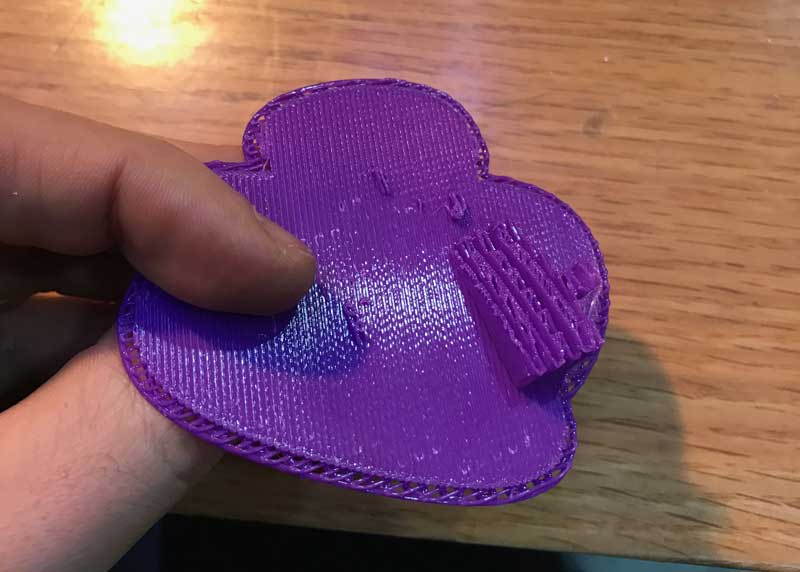
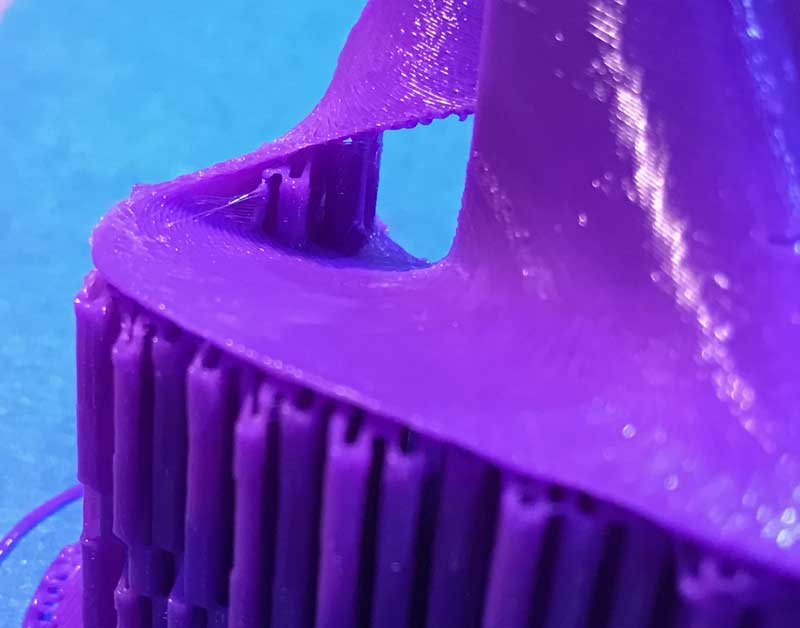
The scaffolding is printed in an accordian pattern which I think makes the structure easier to remove, usually as one piece. However, in this type of object design, the scaffolding can become problematic. In many zones, the scaffolding wraps around the ribbon, sometimes on three sides! I had to carefully cut away portions of the structure with scissors to wedge it away from the mobius. Fortunately, Simplify3D is capable of editing the generated structure. Next time I can edit the structure pre-printing to avoid wrapping pieces.
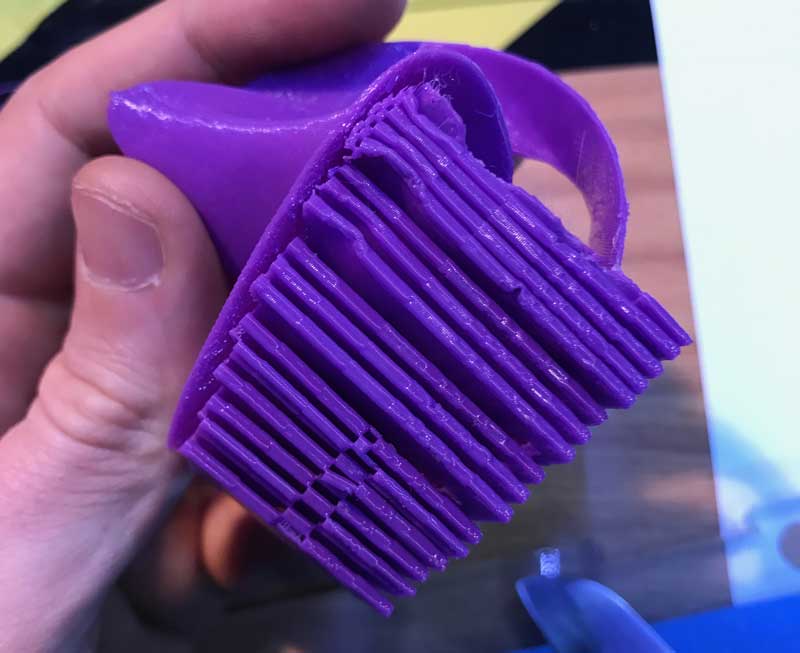
The scaffolding wrapped over the top of the ribbon near the top left of this photo making a full sectional wrap.
I will return to tweak the setting further to find how clean I can get this print and to test another application: slic3r in the near future.
Download project files
I will post links to resources I have found helpful here.
Share this post...
« Previous post :: Three dimensional scanning wildCardboard
I tried to scan one of my previous projects, wildCardboard with the Microsoft Kinnect using the Skanect application. How about starting with an image of the outcome? Plug the Kinnect into your computer's USB port then launch the Skanect application. The interface is straightforward. The first tab are variables for the type and size of the 3D scan. This model fits within an 300mmx300mmx300mm virtual bounding box. I will touch on this more later, I found it to work a little better to give plenty of extra space so in subsequent scans I added padding to the size of the...
Next post :: Precedents »
Most of the science I used comes from Dr. Paolo Bombelli's excellent research in the field of bioelectrochemical processes. This includes his published research: Electrical output of bryophyte microbial fuel cell systems is sufficient to power a radio or an environmental sensor and Biophotovoltaics: oxygenic photosynthetic organisms in the world of bioelectrochemical systems and Biophotovoltaics: Energy from Algae published in Catalyst Vol 21 #4, April 2011. Alex Driver and Carlos Peralta's collaboration with Dr. Bombelli Moss Table. In a series of collaborations, they were able to run environmental sensors and a small LCD display for two weeks uninterrupted and operate...