2017 May 23
#electronics
#coding
#comm
Infrared light is invisible to the human eye, so it is a challenge to know if the infrared LED is operational. Further, the sensors need to be operationally tested. I setup some simple arduino sketches to confirm the board.
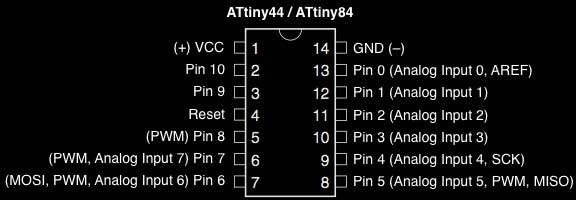
First, you need to match the ATtiny44 pins to Arduino speak. Look at this graphic and compare it to the schematic. The LED is on ATtiny 12, irLED 11 and irSensor 10. One, two, three. I will add those as integars.
Now, many cameras can see infared light. The front camera on newer iPhones is one such camera.
const int irPin = 2;  // ATtiny44 11

void setup() {

}

void loop() {
digitalWrite(irPin, HIGH);  // Turn on the irLED
}
}
The camera needs to be aligned dead on which is not easy using a camera without a viewfinder. Nonetheless, both infrared LEDs are working.

Now I will check the sensor. For this test, I modified code from my IR sensor trials.
#include <SoftwareSerial.h>
SoftwareSerial mySerial(0,7);         // RX PA7 6, TX PA0 13 (flipped)

// Using an ATTiny44
// Pin Configurations
const int ledPin = 1;         // PA1 12
const int irPin = 2;          // PA2 11
const int irSensor = 3;       // PA3 10 ADC3
int sensorValue = 0;          // variable to store the value coming from the sensor


void setup() {
pinMode(ledPin, OUTPUT);
pinMode(irPin, OUTPUT);
pinMode(irSensor, INPUT);
mySerial.begin(19200);              // I set this to 19200 and arduino monitor to 2400
mySerial.println("Hello");
}

void loop() {
sensorValue = digitalRead(irSensor);// read IR sensor write to variable
mySerial.print("sensor ");
mySerial.println(sensorValue);        // send reading to serial
digitalWrite(ledPin, HIGH);            // visually confirm read timing
delay(60);                         // pause between readings (not too fast for stability)
digitalWrite(ledPin, LOW);
delay(60);
}
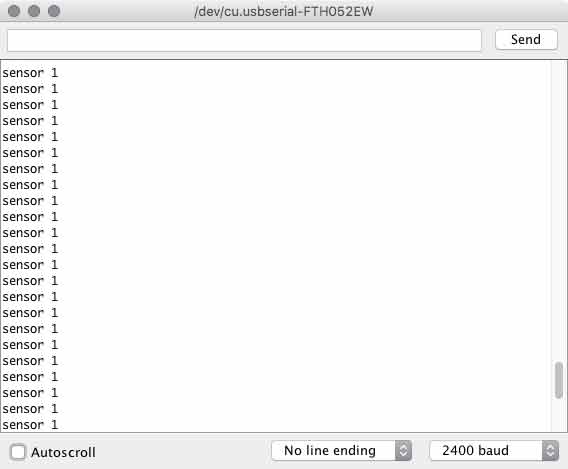
I did not see any variation in the sensor readings when I pointed the infrared light at the board. When the sensor receives light, it should read a 0. Then I recalled Enrico Bassi had the same problem and he made code for transmitting infrared light at 36kHz.
I modified my transmitter board code with Bassi's 36kHz loop.
const int ledPin = 1; // ATtiny44 12
const int irPin = 2;  // ATtiny44 11
const int irSensor = 3;   // ATtiny44 10
long previousMillis = 0; //to calculate the interval of the blink without using a delay
unsigned long currentMillis = 0;

void setup() {
pinMode(ledPin, OUTPUT);
pinMode(irPin, OUTPUT);
pinMode(irSensor, INPUT);
}

void loop() {
while (currentMillis - previousMillis < 125)  //LED on timing
{
IR();
digitalWrite(ledPin, HIGH);
currentMillis = millis();
}
previousMillis = currentMillis;
while (currentMillis - previousMillis < 125)  //LED off timing
{
digitalWrite(ledPin, LOW);
currentMillis = millis();
}
previousMillis = currentMillis;  //reset counter offset
}

void IR()   //36kHz infrared transmitting
{
digitalWrite(irPin, HIGH);
delayMicroseconds(20);
digitalWrite(irPin, LOW);
delayMicroseconds(7);
}
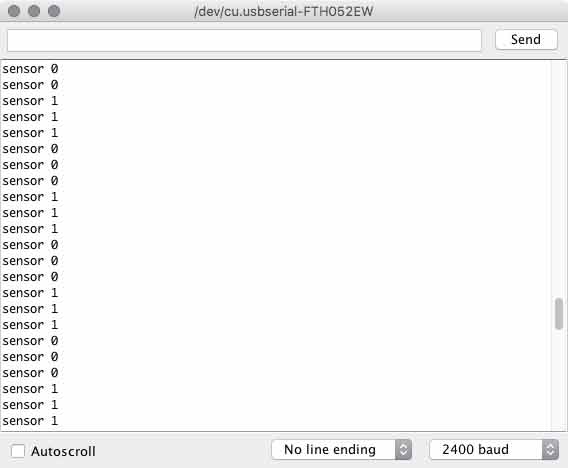
Sensor one is confirmed. I am still having problems with understanding the board clock timing and how to adjust these numbers accordingly.
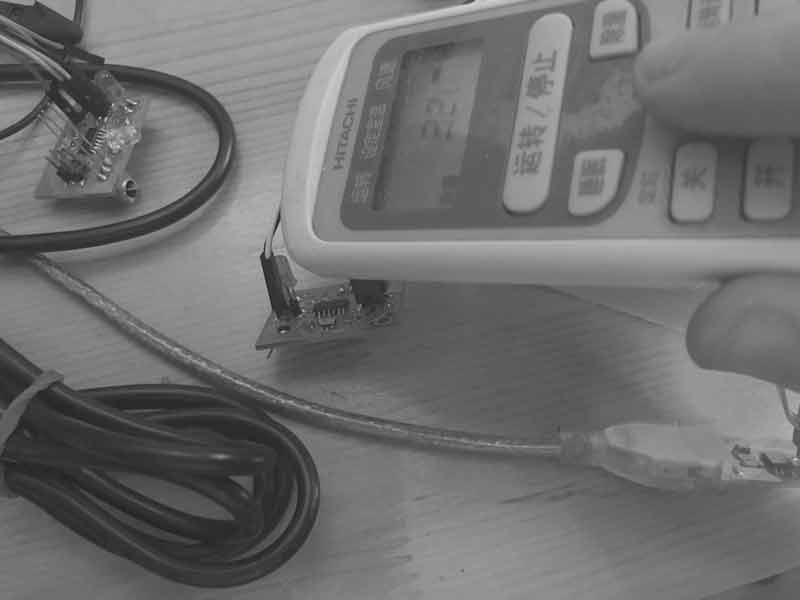
The second sensor is unresponsive. The soldering looks good. I thought it might be an issue with the smaller irLed, so I grabbed the air conditioning remote. The sensor worked so I think there must be a problem with the smaller irLed I used. No, I just realized I forgot to dictate the pinModes in the setups. Now everything is working much better. (I added the pinMode settings to the code above, whereas previously I was not using.)
Download project files
I will post links to resources I have found helpful here.
Share this post...
« Previous post :: Chinese calligraphy G-code encoder
When writing Chinese characters, there are rules. You can either abide or you will be revealed a fraud. When we first tested the machine, we tried several online g-code generators (link?). One thing we did not find was a good way to specify stroke ordering and directionality. I was excited to show some Chinese people the first successful tests of our machine and everyone criticized the machine's stroke order! I started to investigate the possibility to write code we could use to generate g-code which follows the basic principals for patterning strokes in Chinese characters. And, this was a good...
Next post :: Processing : coming around. »
In graduate school, I had the fortune of learning a bit of Processing, which I used in an interactive design project called FIZZLE in Hollywood. That was then, this is now. Now is a time when I have forgotten everything. Until today. From the processing website: "Processing is a simple programming environment that was created to make it easier to develop visually oriented applications with an emphasis on animation and providing users with instant feedback through interaction. The developers wanted a means to “sketch” ideas in code. As its capabilities have expanded over the past decade, Processing has come to...