Tags
Wild Cardboard
2017 Feb 11
#cut2d
#wildCardboard
#CCC
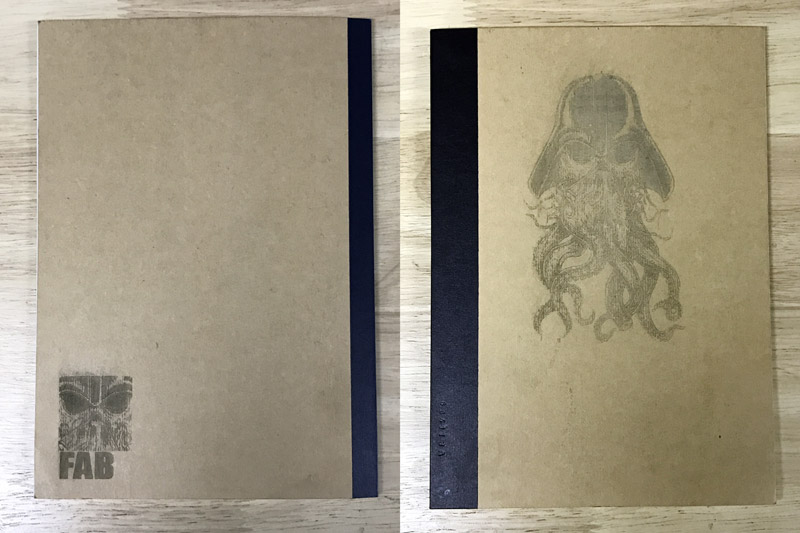
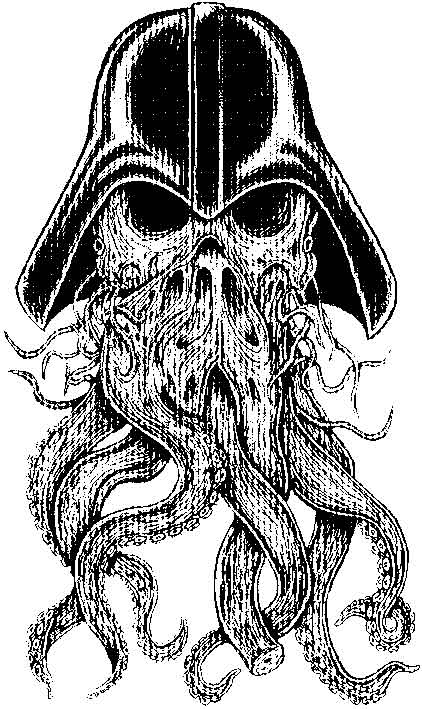
For fun to practice with adjusting and experimenting with settings, I decided to make an engraving on my notebook. I happened to have a Darth Vader - Cthulhu (maybe my two favorite things?) portmanteau on my desktop...
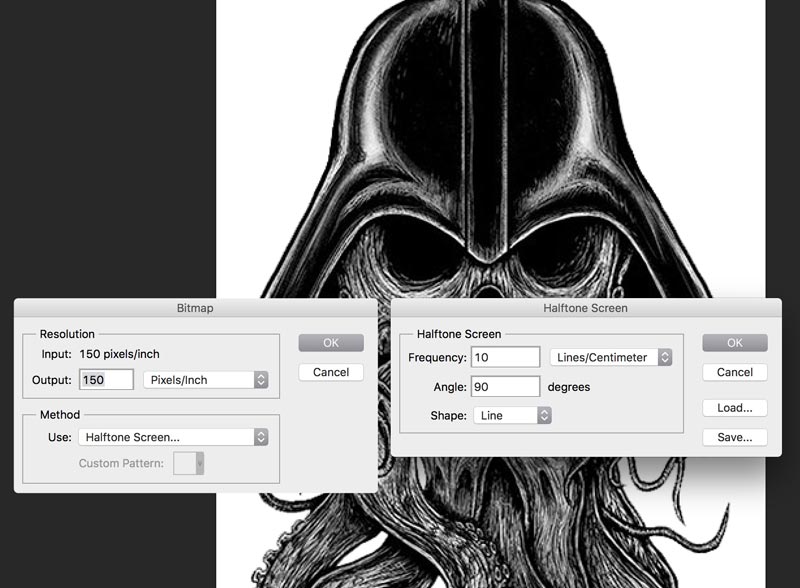
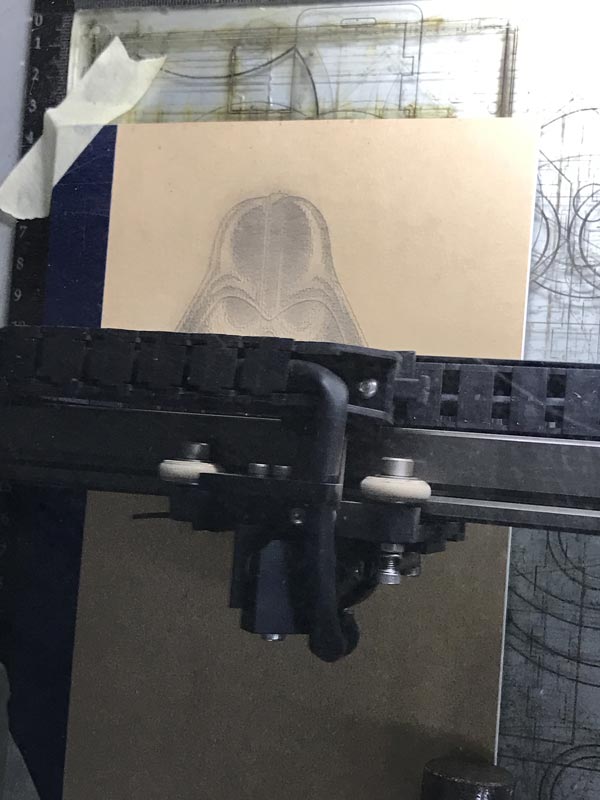
In photoshop, I resized the image and converted it to a bitmap. Within the bitmap settings there are a number of different methods, each producing different pixelation effects. I wanted to make something expressive of vertical lines so I used the "Halftone Screen..." and after a few tests, came to 10 Lines/cm, 90 degrees (vertical) angle and the "Line" shape. I also found adjusting brightness and contrast before producing the bitmap to be helpful in effecting the white to black ratio.
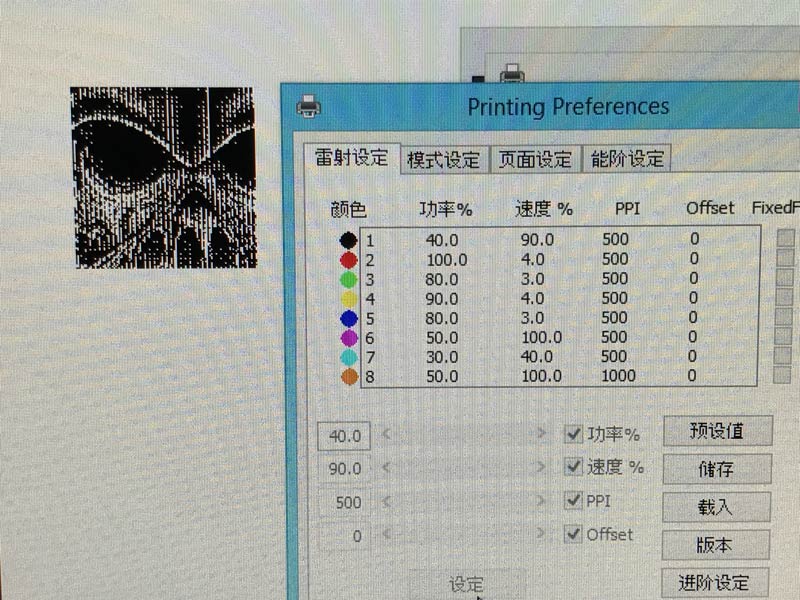
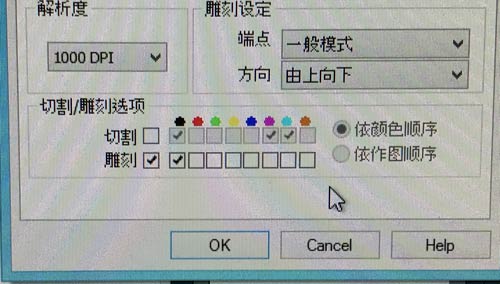
I was able to send the job to the cutter directly through Photoshop's print command. Remember to run through the printer specific preferences. I was only concerned with the settings for the black, 1. After testing a few different combinations, I thought 40 power, 90 speed, and 500 PPI was okay. I do wish the final product had more darkening from burning. Another time, I will test more combinations to try to isolate the variables that encourage burning in etching. On the second tab, I check only etching and the black. On the third tab, within the checked box I can tell the machine where to assume the origin according the position of the laser head at the start of the job. I need to get translations of all the options within the box, this one I know is upper left. Perfect. When using this type of printing, I adjust the bed size to match the image size. Change the 660mm x 495mm to 30mm x 30mm for the test and about 70mm x 120mm for the final.

Laser etching from a bitmap is a significantly longer process for the cutter. Each of these 3cm x 3cm images took around 5 minutes. Be very careful in removing the excess dust after finished. I used a paint brush very gently.
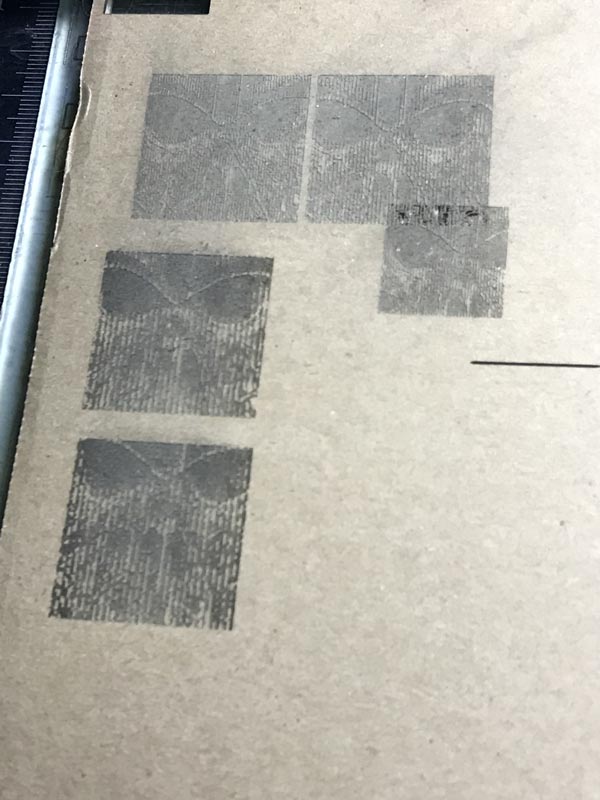
After a few tests, I came onto this bitmap as a good balance of white and black. I think the 10 lines/cm in the halftone screen is the highest density replicable by this laser cutter. More lines/cm starts to cut into the white space making the fabbed image appear a little darker than the screen image. Have fun. Fab responsibly. Fab or die. Fab to live. Fabby Fab.
I will post links to resources I have found helpful here.
- Buy a Darth Cthulhu Print : The source image I modified.
Share this post...
« Previous post :: Fusion 360, introduction
Fusion 360 seems like a powerful cloud based 3D modeler compatible with OSX, Windows and several mobile OSs. The advantage of the cloud based file structure is always having access to your files (assuming you have internet access, if not... ya screwed) and a built-in collaborative platform. Autodesk is hosting built-in cloud based fabrication and rendering tools as well. Many file types can be imported or exported, in fact, Fusion directly connects to McMaster-Carr's database and quickly pulls in any number of parts. The modeling mostly involves interfacing with a visual modeling window and is capable of setting reactionary relationships...
Next post :: Kerf : what is it? why is it? why care? »
A laser beam is generated in the back of the machine and reflected through a series of mirrors, through a focusing lens then the material. The narrowest part of the beam, around an 0.32mm diameter, is aligned to the material (z-axis). The head of the machine moves along X and Y axes across a cutting bed directing the laser through the designated cuts. The intensity, speed, and pulses per inch (ppi) are user defined variables, in my case defined first by line color in the design software and second via a dialogue in the machine settings. These variables will effect...