2017 Apr 25
#cut3d
#model3d
#castmold
#subFab
For my niece's birthday, I three-d printed a star puzzle. The toy however could never be dismantled after I muscled it together due to poor printer calibration on my part (a running theme in this blog). Further, duplicating the toy many times over comes with the time factor of three-d printing. Hint : slow. So, I thought it would be fun and good proving grounds to revisit this project in this exercise. And, the other day she asked if I had made the better version of her toy yet and gave me no leniancy for time spent building my first robot.
These photos set the scene. I downloaded the STL file from a previous student of the How to make Almost Anything course at MIT.
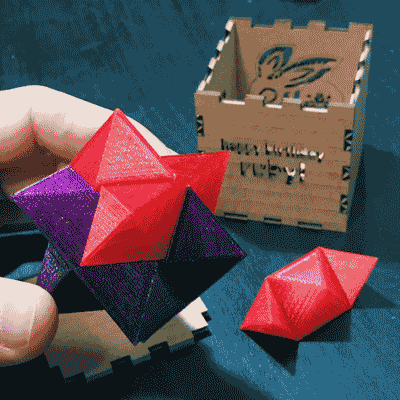
In a sea of hongbao (red envelopes stuffed with money) this little broken puzzle was a champion.

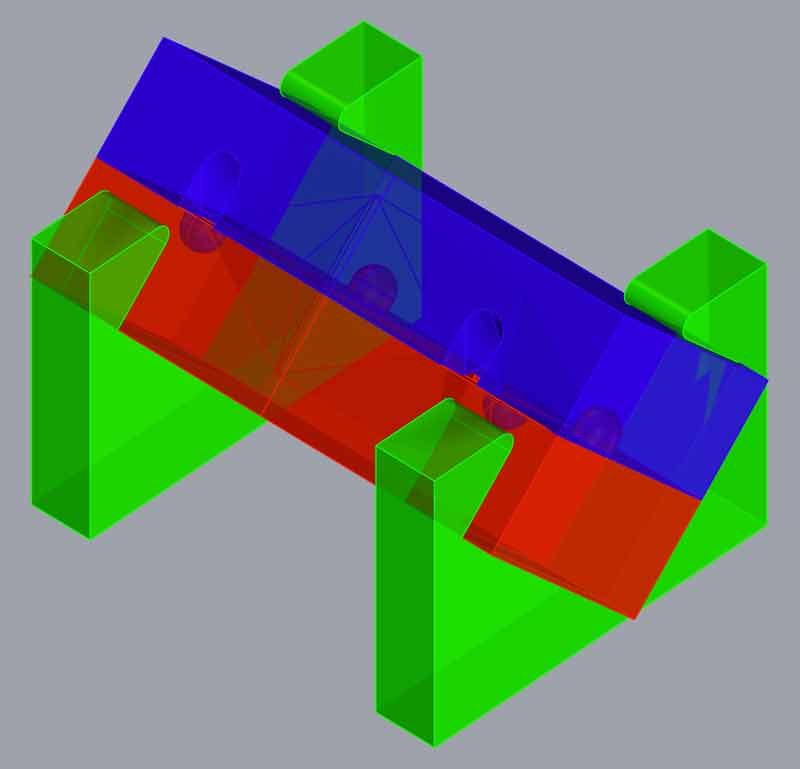
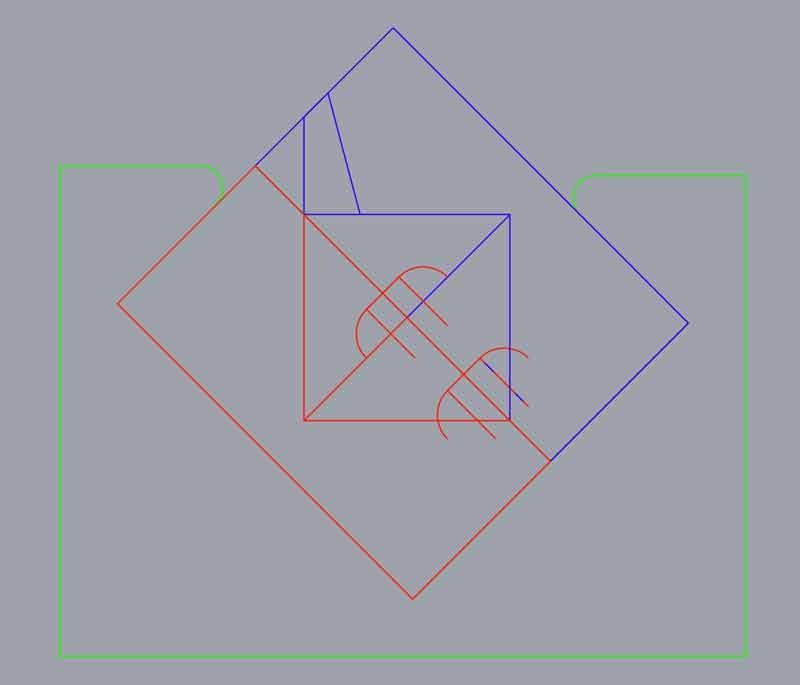
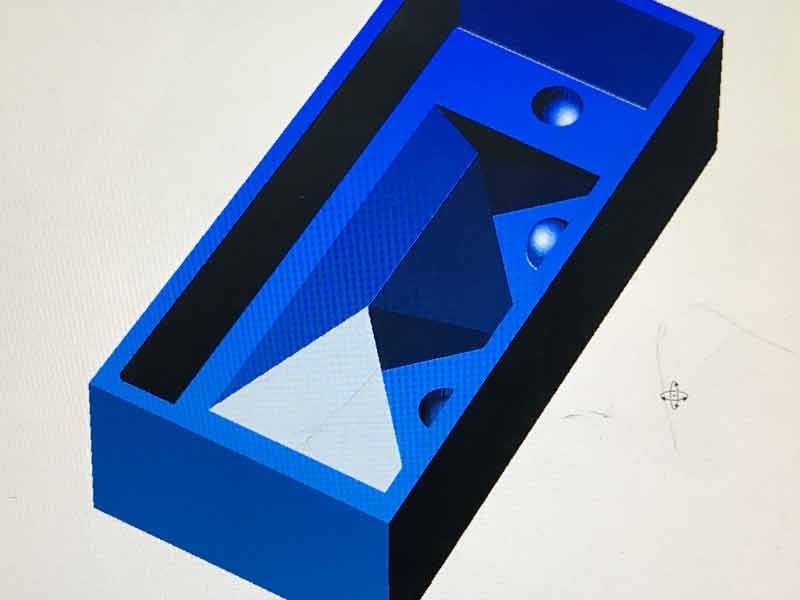
I remodeled the toy into a mold measuring about 37 x 79 x 17 mm. There are two inside angles the mill will not be able to complete. I will try to hit those with some hand tools before making the mold.
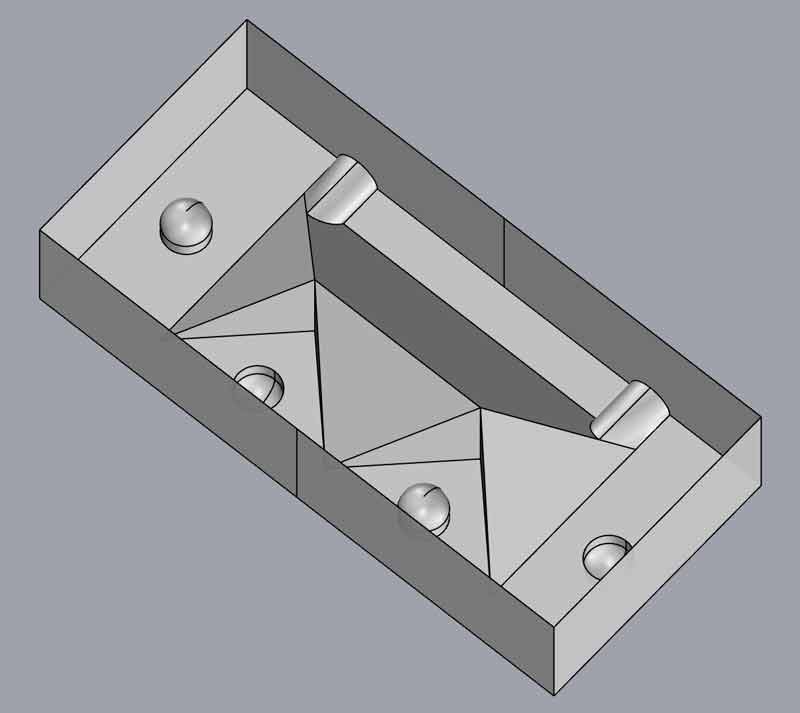
When I thought more about casting, I realized getting a perfect cast is going to be tricky. Using this method, I would only need to mill one form, cast it twice and then when I cast the final object I will have some excess material inside my air / casting channels. Looking at this now, I might edit that channel so it bottlenecks briefly before the finish surface. That could help guide a blade and make it easier to snap off the extra material.
I thought if I oriented the final piece so the top surface was level, there might be less trimming involved. However, I would need to either mill two forms, or drill into one mold after it is made.
Inspecting the final casting phase, I am concerned there is a chance air bubbles could get stuck in the square corners.
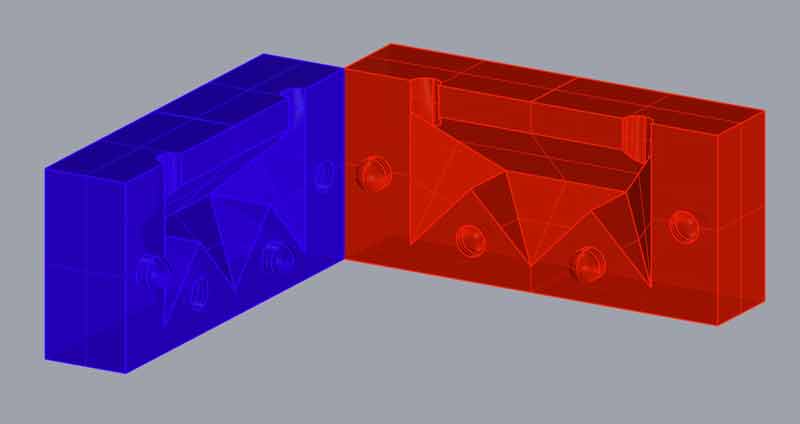
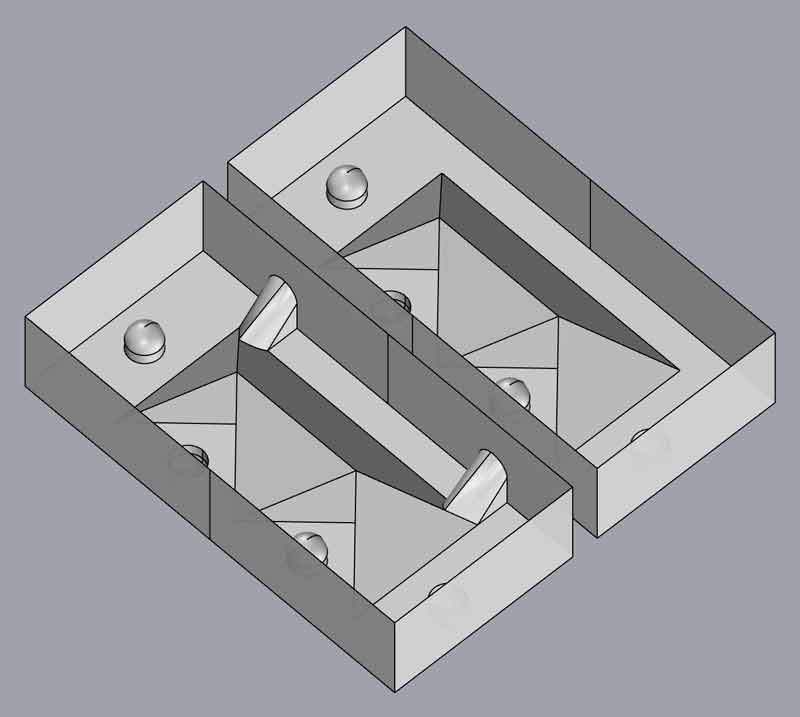
After consulting the regional review group, we decided to pursue my second option by cutting one form and adding a second material to the form to make the air and casting channels for one mold.
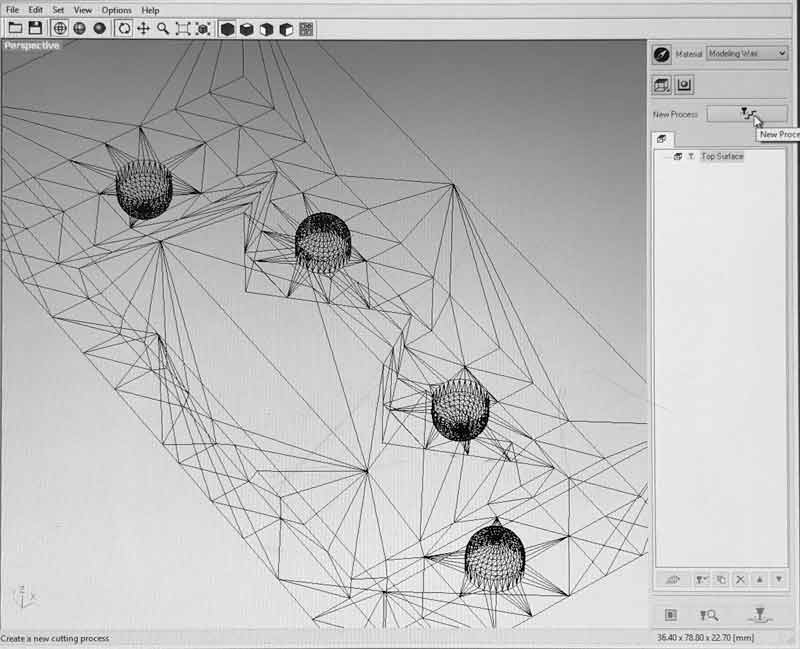
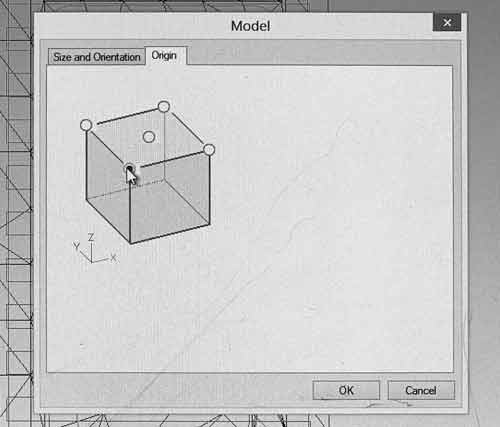
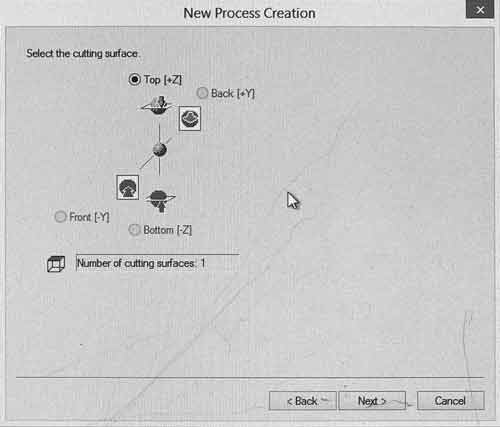
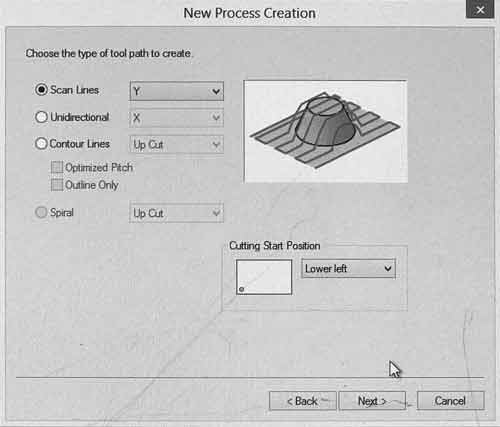
I used Modela Player 4 to generate the tool paths. You can do that too. First export your file to STL format then open it in Modela Player. I formatted the model to only include cutting surfaces before exporting. In Modela, check Set > Model > Origin and ensure the model origin is where you assume it to be. Then you can start making processes.
It would be wise to start with a rough cut.
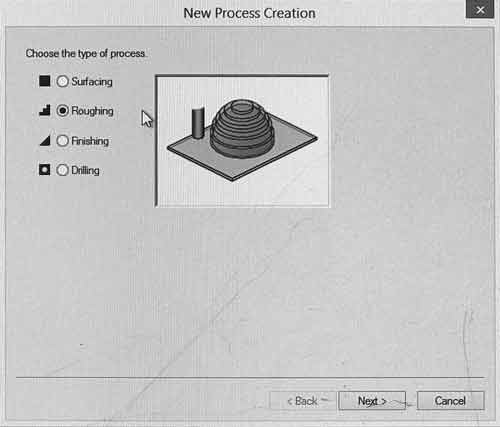
Cut the "top" side of the surface.
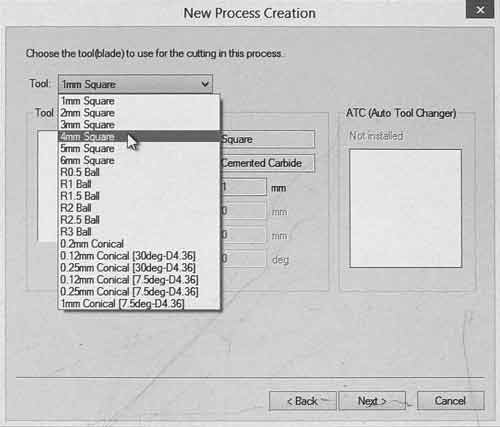
I chose a 4mm square bit. Different bits, different advantages. Remember, one 4mm square cut bit can be very different from another. For instance, these are two 3mm square endmills, one is capable of more than 2x the cutting depth than the other. This is an important consideration for walls perpendicular to the XY plane.

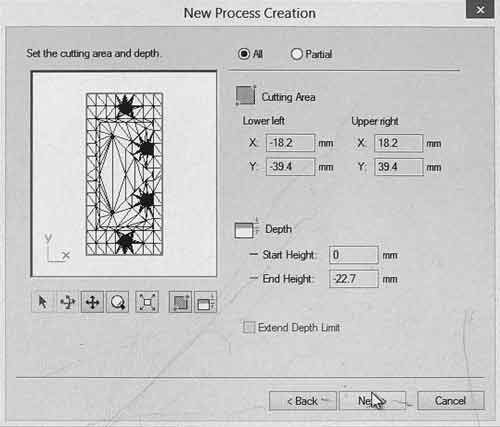
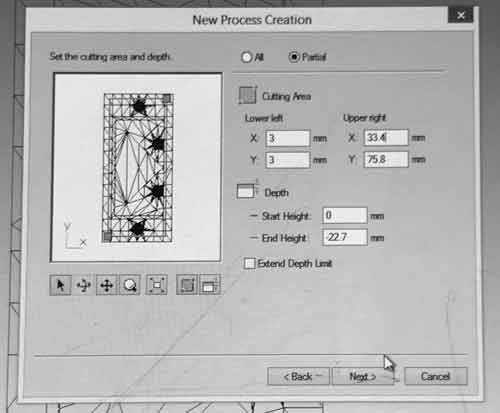
Double check the cutting area is correct visually and by the numbers.
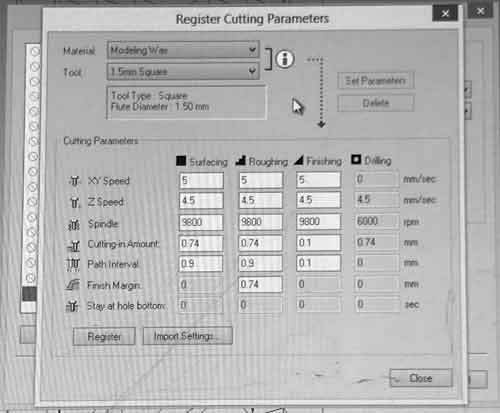
After simulating the different cutting patterns, I found countour lines preferable. It offered a nice balance of speed and precision. For the cutting parameters I kept the defaults for modeling wax, except I changed the cutting in amount to 3mm.
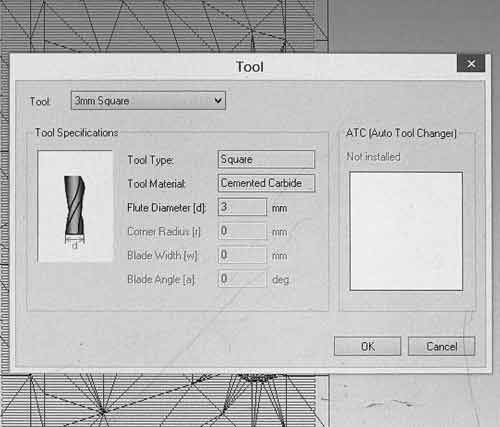
Next, I setup a finish cut process using a 3mm square bit. I might have liked to try a 2mm square bit but there were none in stock in the lab today. We did not think a round bit, another option, would make a big difference on the sloped sides of the model.
For the finishing path, I chose scan lines in the X direction to see how the model looked after. It was a quick job for the machine; if I wanted a better finish I could cut more after (for instance another path in the perpendicular direction).
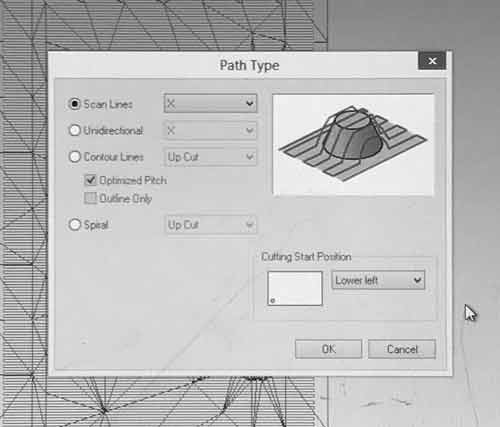
In the cutting parameters I changed the path interval from 0.1mm to 0.3mm, a 10% offset.

When the jobs are satisfactory, select Create Toolpath and there are some options to preview the job in 3D and get time estimates, which in my experience were hit and miss, big time miss.
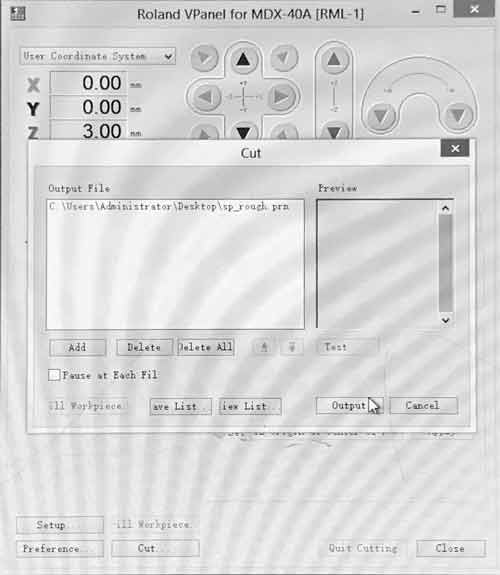
When finished, select Cut and output the toolpaths to individual files.
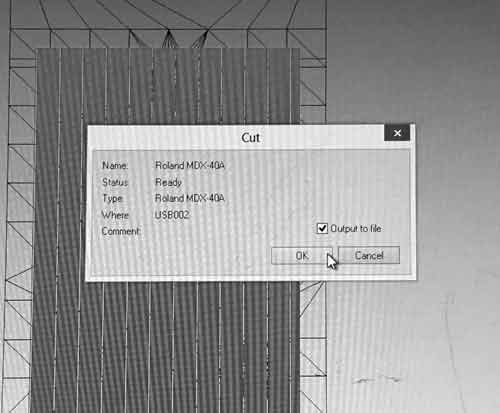
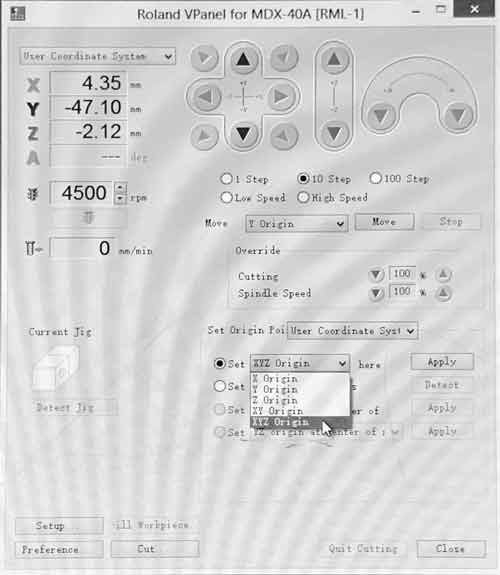
Roland VPanel for MDX-40A works much in the same way as the application for the SRM-20. Set the origin and kick it. The Z origin does not need to be as precise as is the case when milling PCBs. In fact, the first cut of the rough cut is set to 0.2mm Z.
Cut the files individually, sequentially, and make tool changes when necessary before cutting.
While cutting, some of the removed material will accumulate in the cutting zone. Periodically remove this material so it does not hurt the form. It can be collected, cast into a form and reused later! On the Roland Modela MDX-40A press the View button to pause the job. Long press the View button with the cover closed to resume after clearing the debris.

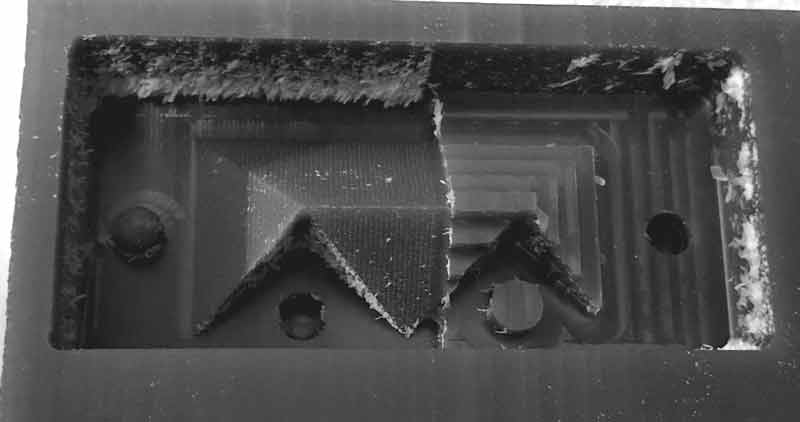
The rough cut is on the right and the first finish cut on the left. The rough cut took about 10 minutes and the finish cut 30. I decided I would like to make the model smoother so I did another finish cut with a 1.5mm bit offset at .1mm which needed nearly two hours.
I had to make a new bit as this tool was not in the application's inventory. Options > Add/ Remove Tool
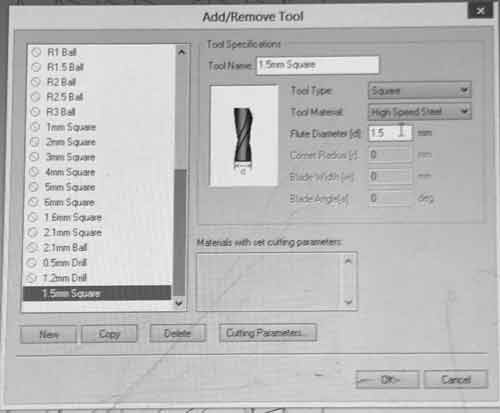
The cutting depth of the 1.5mm bit was not sufficient for the outer walls of the form which is fine because I am not seeking higher resolution there. I reduced the work area by 3mm on all sides to add the necessary space for the endmill to work.
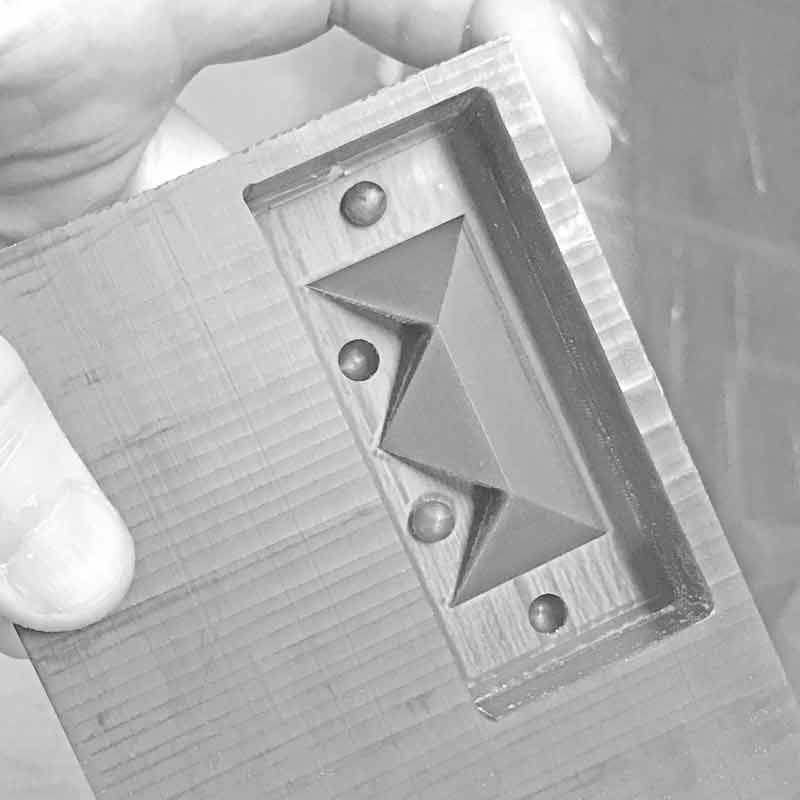
Nice looking form. Now I can get busy with making molds!
Download project files
Share this post...
« Previous post :: Bioelectrochemical testing pod
I would like to begin prototyping grow modules for Pure Imagination. The first challenge is setting up a plant microbial fuel cell system for generating electricity with moss. This work will heavily rely on the scientific research from Paolo Bombelli, et al. I thought I could cast this pot... ...and thinking how to do that with ooloo is tough. I think slip casting or vacuum forming would be the easiest route. I have experience vacuum forming and more, and would have some concern with the finishing that would need to be done after pulling a form for this object. If...
Next post :: ...Oomoo... »
"OOMOO® 25 & 30 are easy to use silicone rubber compounds that feature convenient one-to-one by volume mix ratios (no scale necessary). Both have low viscosities for easy mixing and pouring . . . vacuum degassing is not necessary. Both products cure at room temperature with negligible shrinkage." These silicones also have great tear strength. Oomoo is a two part substance which requires thorough mixing before use. I am using Oomoo 30, which has a ration of part A : part B, 100 : 130. If you trust the buckets, you can do that. You might want to check that...