2017 Apr 22
#model3d
#print3d
#coding
#dishuBot
#machine
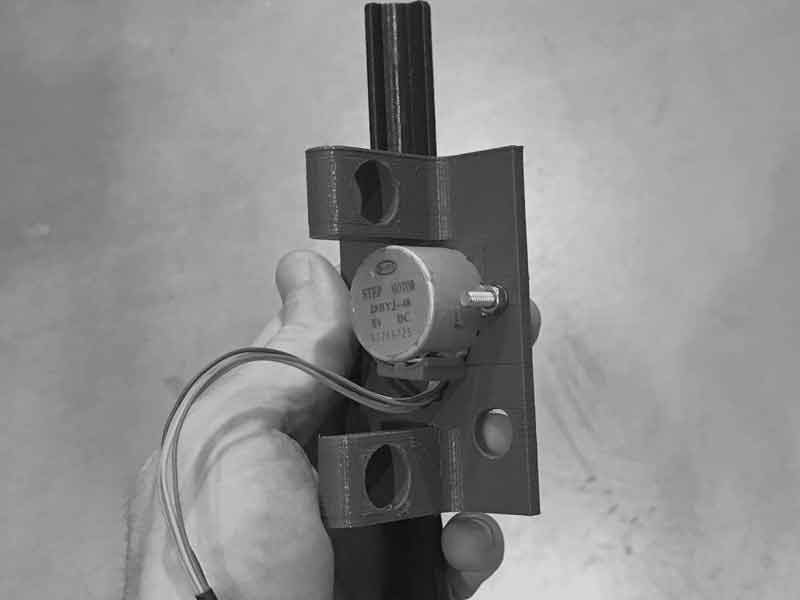
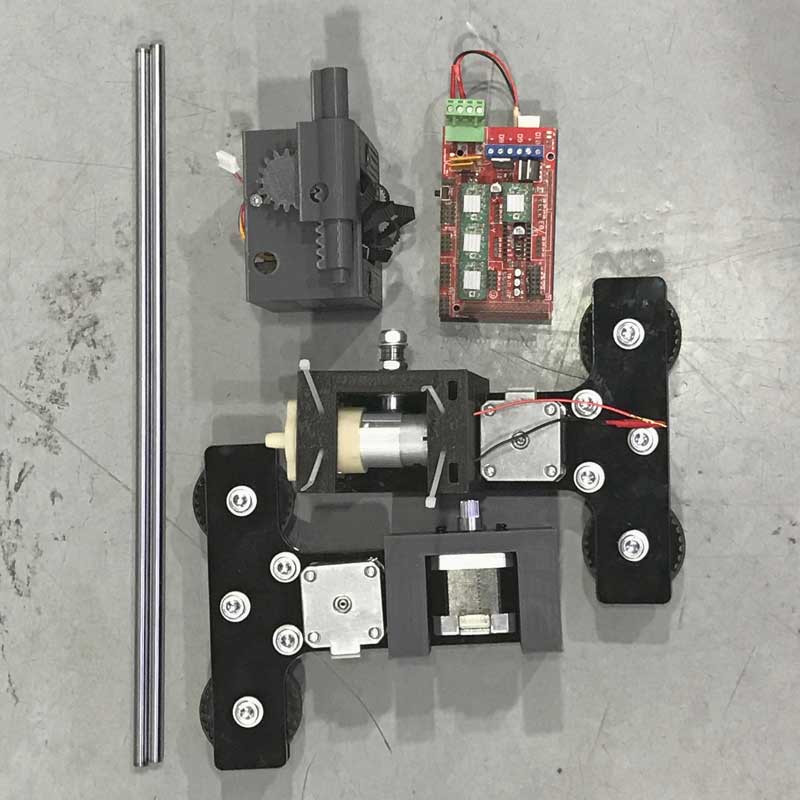
The effector pushes the brush into the drawing surface and pulls it away. Included in the mechanism is the flow of water from the reservoir into the brush tip. This design uses a 2BBYJ-48 stepper motor we had in stock in the lab. Precision of movement is not needed.
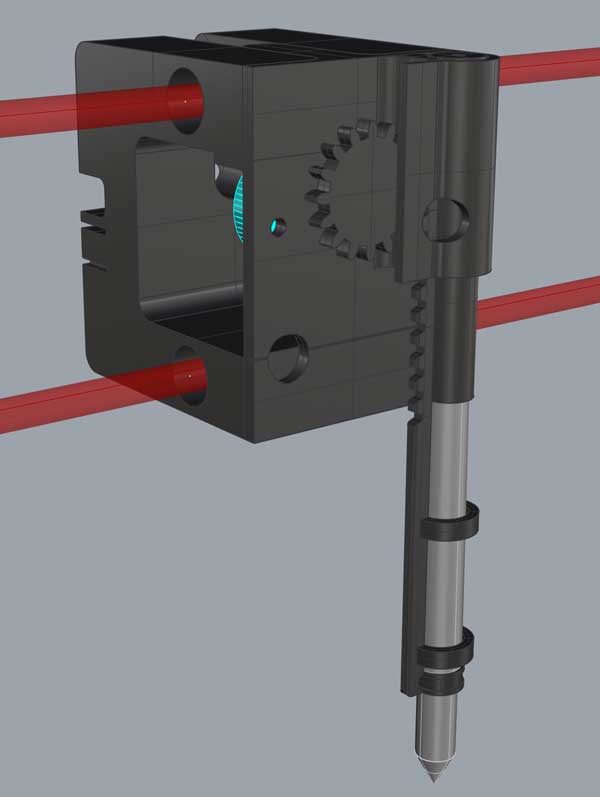
In the design of the stage, I left some gaps that could be used to attach an effector shield. We also looked at an effector designed by Simone Boasso previously. With these starting points, I designed this:
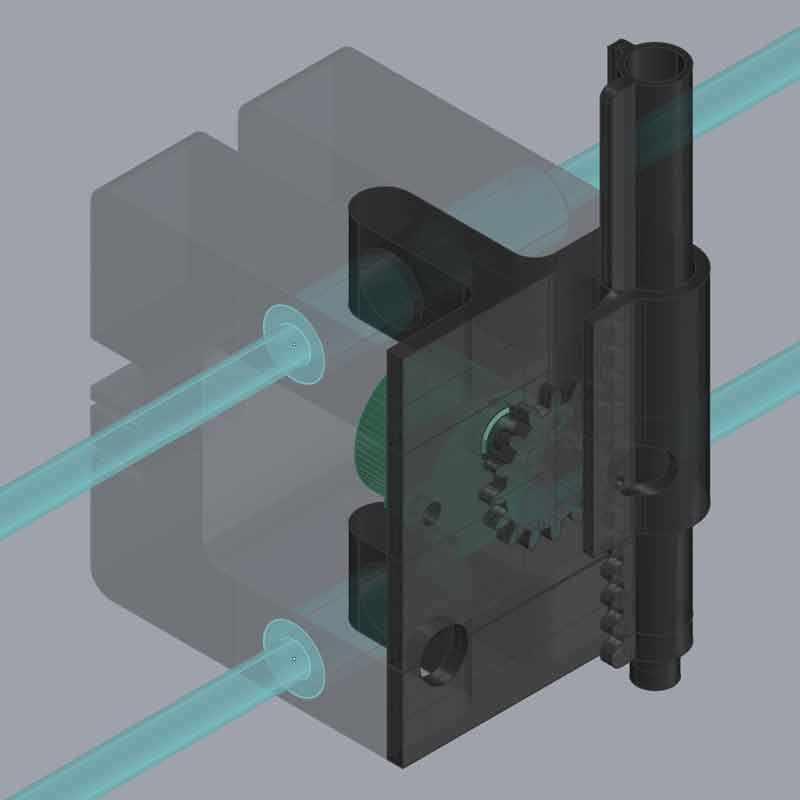
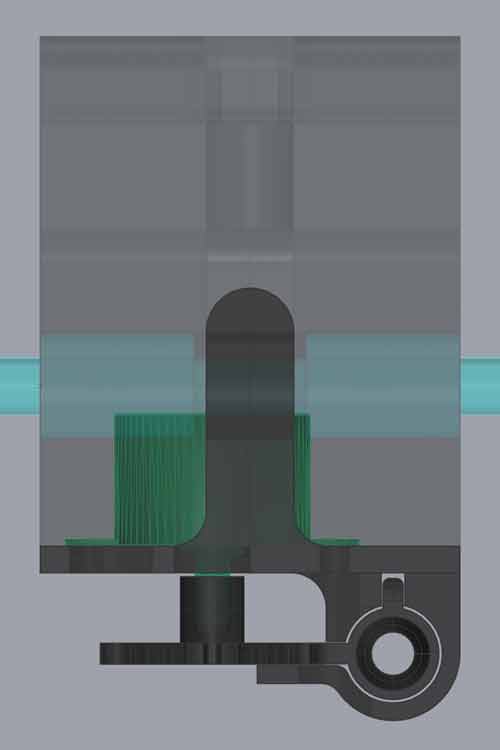
I created a larger guide for the vertical movement with a perpindicular axis for slide for alignment. Further, the center is hollow for the water tube and the end is customized for our brush. And the gaps are adjustments for wiggle and printer calibration.
By this point, my 3D printing game was on point. This piece was a breeze. The rail bearings fit snuggly and the belt fastener keeps.
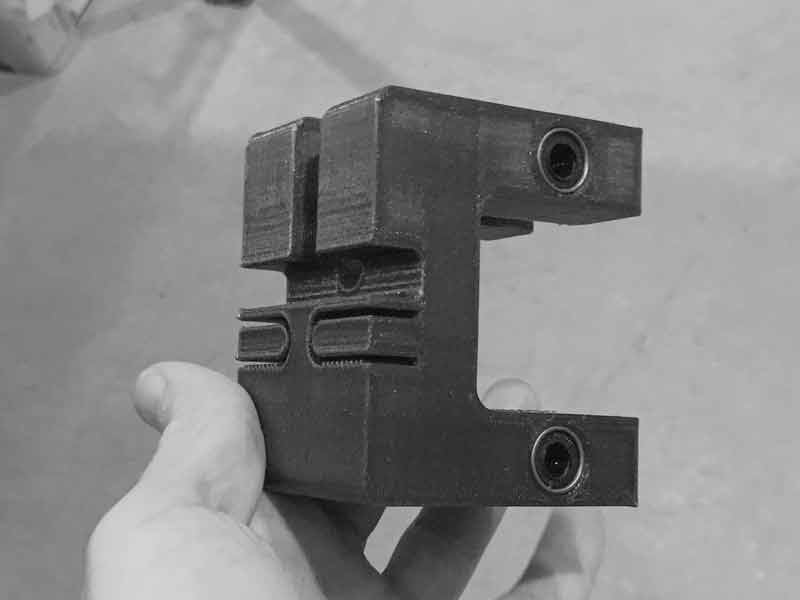
The stage shield fits in nicely without adhesive. I think I could have added a cross at the connection points to make it one step better although there are no problems with that operation whatsoever.
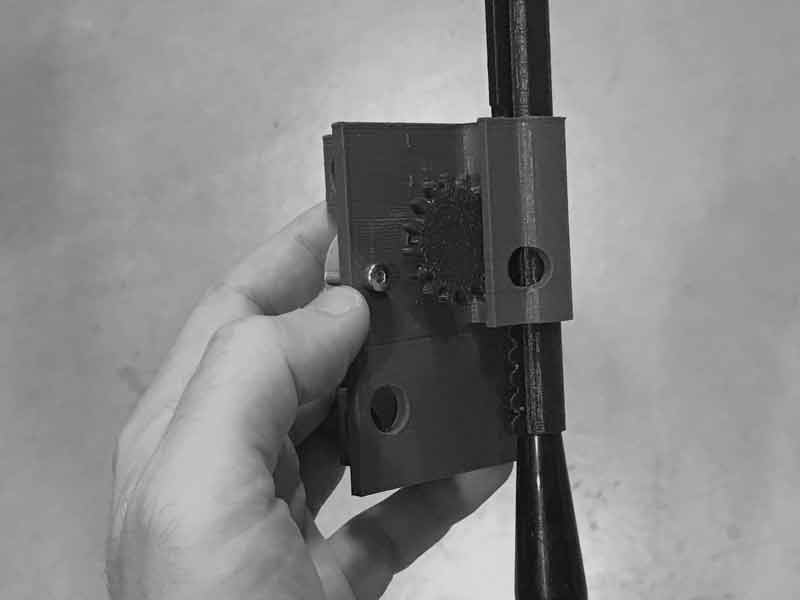
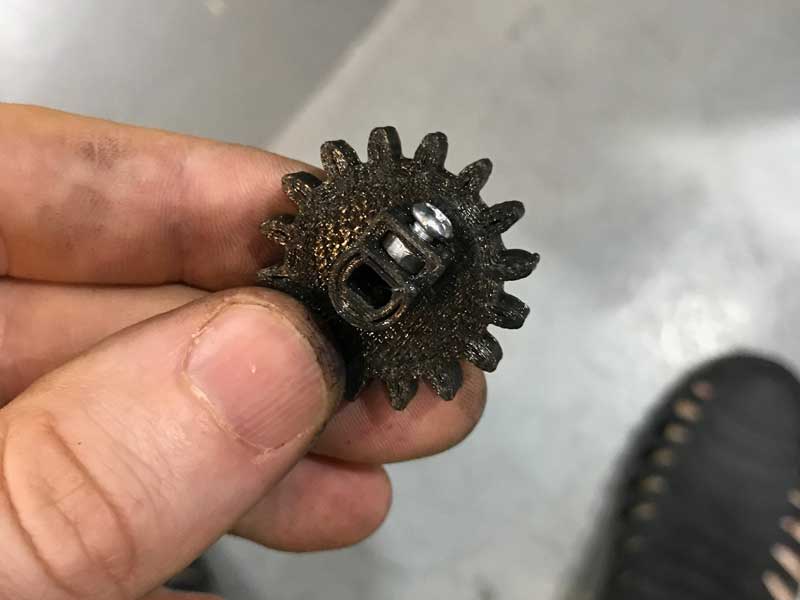
The gear is a little loose so I think it would be better tapped with a small tightening screw. The effector column sticks a little when moving down. We discovered that a sharp corner in the sleeve was catching in the gear teeth. When that corner was filed down, operation smoothed significantly.
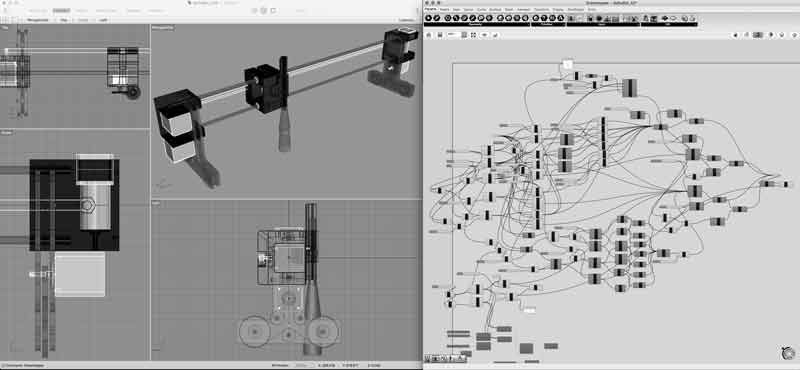
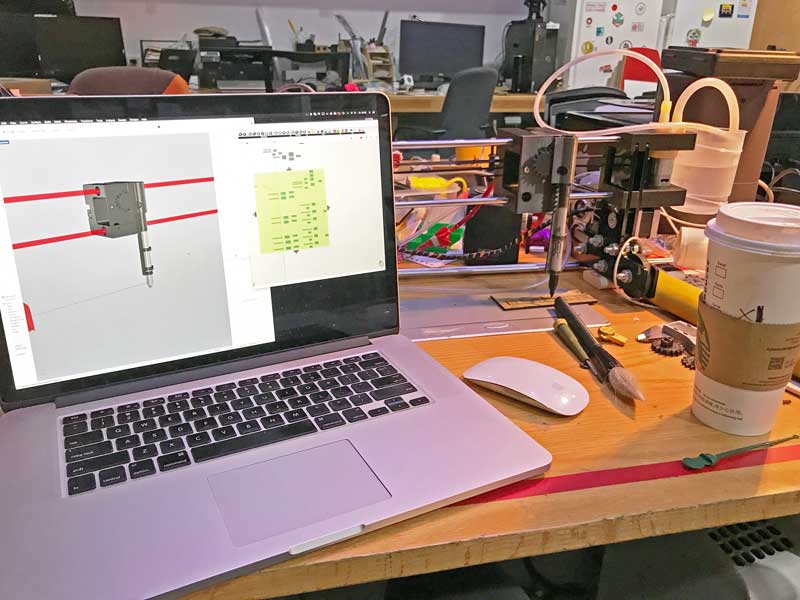
Not the easiest Grasshopper graph to navigate...
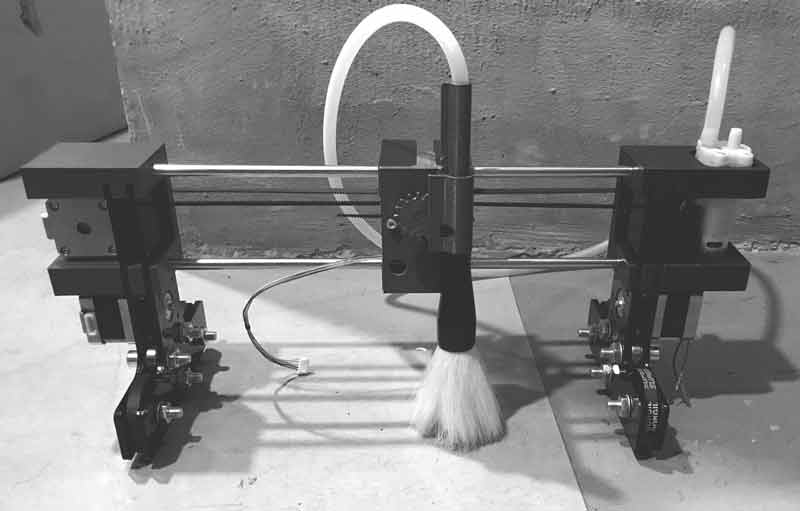
Brushes can easily be swapped out or have a new stem printed to adjust for length and thickness. Alternate shields can also easily be swapped into place. With that, the whole is together. Next I need to return to Arduino and GRBL...
Update: Overall, the weakest point of the project has been the effector. The water flow through the pump is out of control, the movement is fragile and inconsistent. I think it is time for upgrades.
I first tested a smaller tube diameter for the water flow which holds the water well, except when pushed out when the pump motor is engaged. Upon deciding to use this pipe, I quickly made some acrylic fittings to connect the smaller pipe to the larger pump nipples.
Next, I lined the 3D print to brush connection with a generous coating of hot glue. Water is no longer leaking out of this connection.
The connection of the 3D printed gear to the stepper motor in the stage has to this point been press fit. I added space to add a nut and bolt tightener and increased the thickness of the gear wall. Added thickness to the gear wall was to reduce the chance of missing a connection and space was available in the existing design. Print again. 18 minutes later...
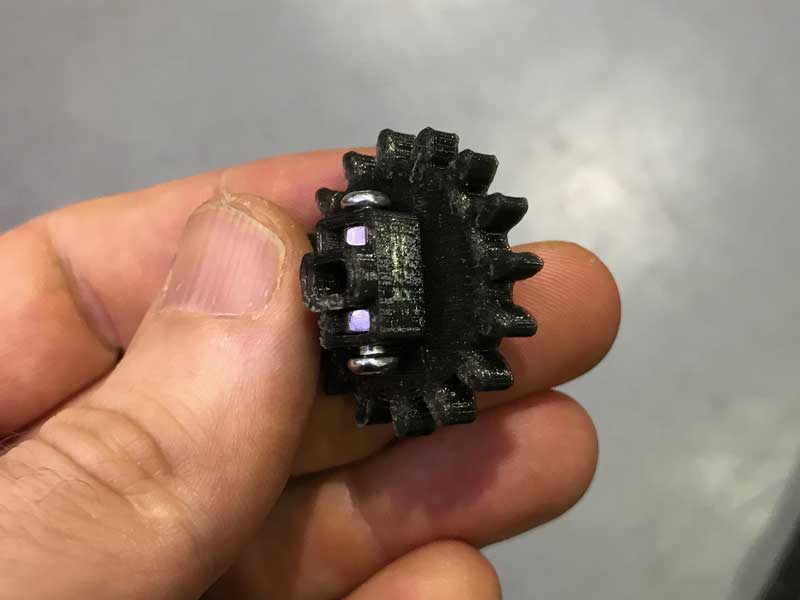
The connection is strong but when I adequately tighen the bolt, the gear skews towards that connection point. Then when working within the system, at a certain rotation it creates too much friction and the motor loses steps working through that rotation.

After discovering and diagnosing the skewing, I mirroed the nut and bolt connection to the other side. When I tighten the bolts on the motor, I do so slowly and evenly. The gear action is smoother and stronger. I like it.
I noticed in testing that the Z axis was missing steps still. I wrote some G-code to test the Z movement. This code will roughly vary the movement speed, height changes and add some pauses. While working through this, I adjusted the V-ref on the corresponding stepper driver adjusting between .400 to .600. Around .500 the stepper seemed to do as desired without getting warm to the touch. Above .550 the motor starts to get slightly warm, not enough so to be alarmed in my use case so I will not hesitate to increase the voltage more as a first level of troubleshooting if I notice more missed steps.e
g90
G0 z10
g4 P0.5
z0
z20
z10
z20
z0
g4 P0.5
Z15
Z20
Z25
G1 Z15
Z7
Z9
Z2
Z20
Z30
g4 P0.5
Z10
Z25
Z4
G0 Z9
Z19
Z4
Z24
Z9
Z2
Z10
Z0
We had always thought of the possibility to swap in different mediums and in fact, I designed both the stage shield and effector stem to be quickly and easily swappable. Plug in play. That in mind, I made a first version of this sharpie effector. There is a spring hidden in the top that halps keep consistent pressure on the invariably warped drawing surface. This first version has some correctable tolerance issues (in spite of successful partial test prints).
Up to this point, I am still working with some non-parametrically designed objects which are now beginning to hamper my development. It might take longer initially for me to setup a parametric system for generating a model as complex as this but making adjustments could not be easier, whereas with this system even the most minor change may take tens of minutes. Until I find time to make adjustments and reprint, this one will work.
I will post links to resources I have found helpful here.
- BYJ48 Stepper Motor : Instructable post about the effector stepper.
- 28BYJ-48 – 5V Stepper Motor Datasheet : Datasheet.
- Customizable Wheel for 28BYJ-48 stepper motor : A better gear connection.
- OpenDot Effector, 2015 : Work by Simone Boasso printed for our prototype.
Share this post...
« Previous post :: EAGLE pt2 : Fabricating the circuit board
I need to export the board design from EAGLE, generate the mill paths and solder the electronic components. The board is ready to be cut; EAGLE's job is complete. Time to export. From the View> Layer settings... menu, set all the layers to invisible except Top, Pads and Dimension. Export the file as a monochrome PNG at 1500 dpi. The PNG may not be exported in perfect condition but can quickly be edited in a PNG suitable editor, i.e. Photoshop, Inkscape. I did not find a good way to export a PNG for the outline cuts. EAGLE has a thin...
Next post :: Prototyping a belt axis »
The Gestalt linear stage used a screw drive mechanic which we thought would be too limiting dimensionally for our purposes. Therefore, we decided to change this axis to a belt drive mechanic. I also wanted to see if this axis could be freed from the cardboard structure of the Gestalt model so it might have interchangeable rod lengths. I went about designing these pieces thinking three-d printing would be the optimal method because I could make non-planar things without worrying about connections and alignments. Three-d printing is slow. Three-d printing, however, is also passive which lets me focus on other...