Tags
#cut3d
#model3d
#castmold
#pureImagination
#mold
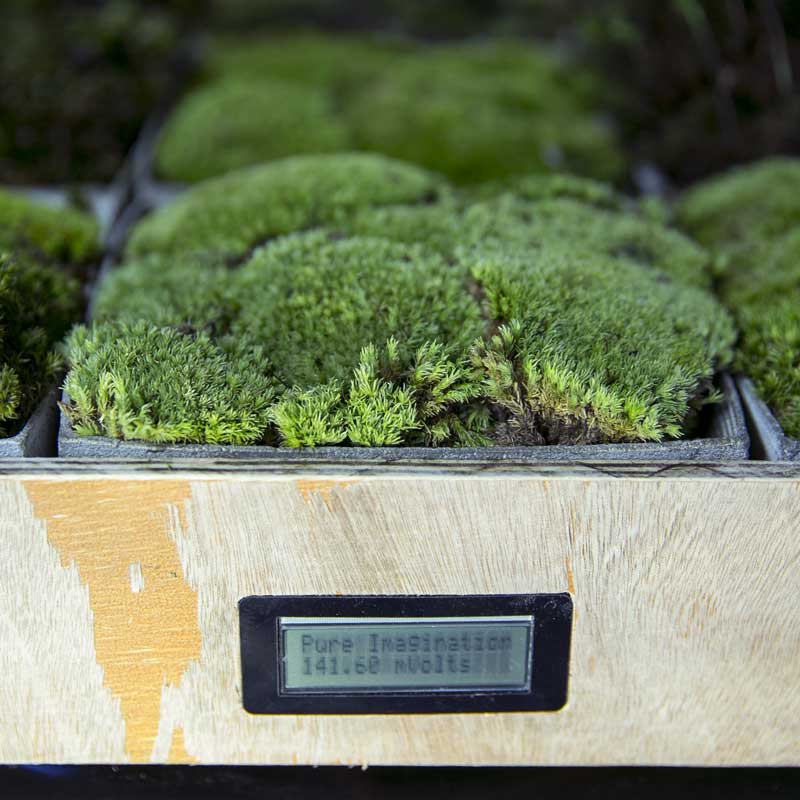
Pure Imagination
- Environmental monitoring with online data logging to Thingsv
- Inventory
- Hessian/ burlap/ crocus composites
- CNC milled wood frame
- Grow monitors | What watches the watchers?
- Grow module | Design and fabrication
- Grow Module | The science
- Processing Light Graph
- Milling a composite mold
- Composites : Modular growth, testing
- Bio-electro-chemistry
- Bioelectrochemical testing pod
- LCD x Arduino
- Precedents
- Discussion
- Design, Materials and Methods
- History : Early concepts
2017 Jun 13
#cut3d
#model3d
#castmold
#pureImagination
#mold
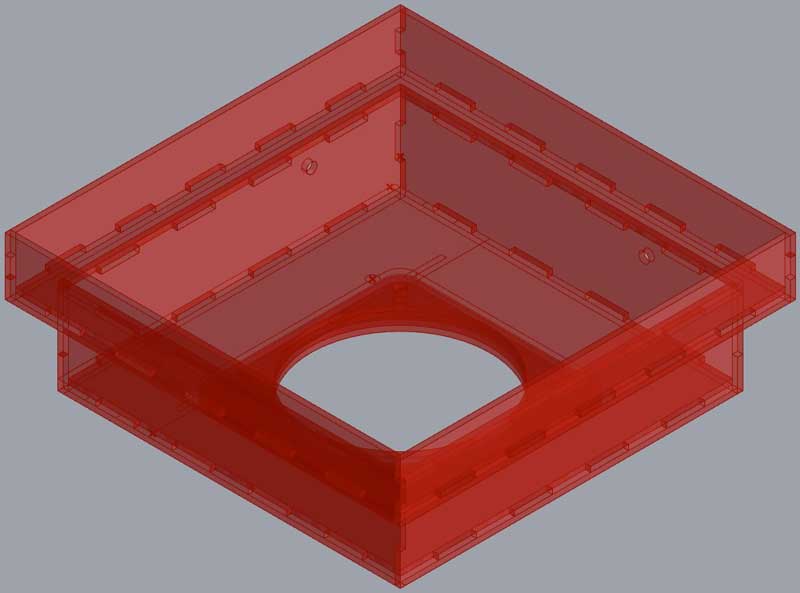
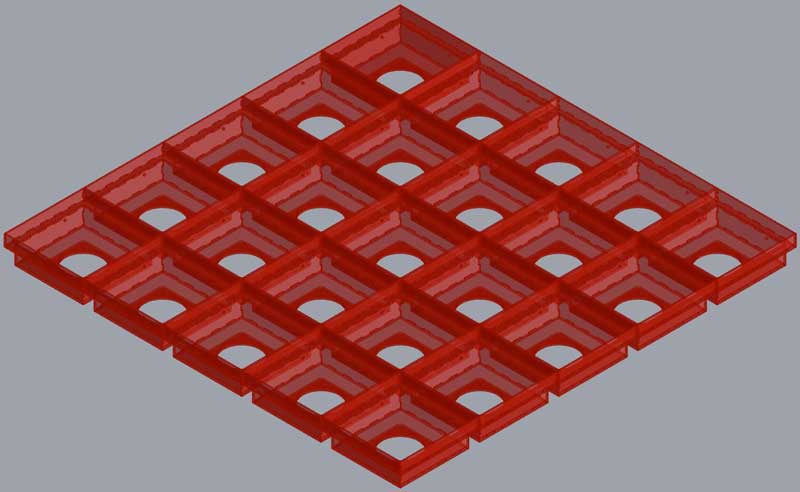
My idea is to first create a small modular testing garden. I began with some sketches on paper and Rhinoceros. The bioelectrochemical modules are red and the frame is purple. I think this way will be able to be broken down and assembled easily and can be grown or reduced by adjusting the array. While the sketch shows a six by six array, I might reduce it to five by five.
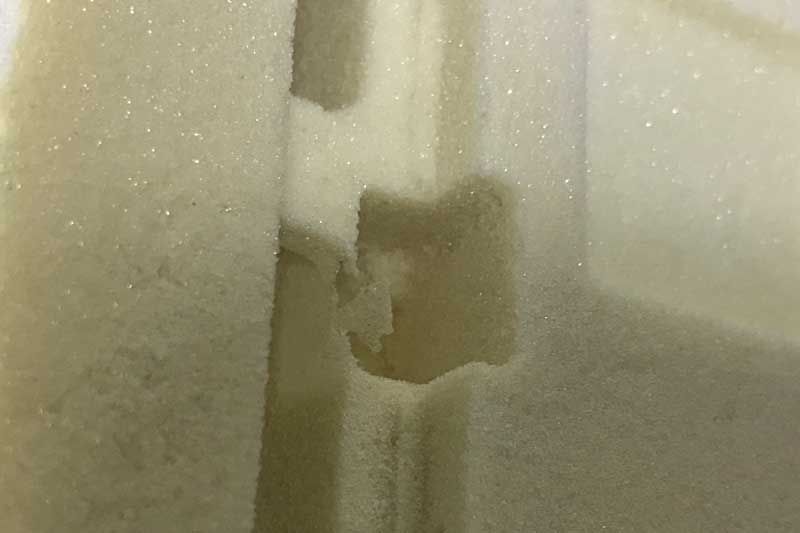
The testing modules were essentially cubes. This module is has a smaller bottom half to create a lip for sitting on the structure. In the upper portion there is a small bolt which protrudes from the module for connecting the cathode. This bolt will occupy the space between the modules in the removed rows of beams. I will do more work on the purple structure later. I need to add legs and configure the electronics holder.

When I was satisfied with the sketches, I started programming in Grasshopper. I started with what I previously made for the testing modules. I have been learning quickly, so I spotted a number of inefficiencies in that version. I like this one better.
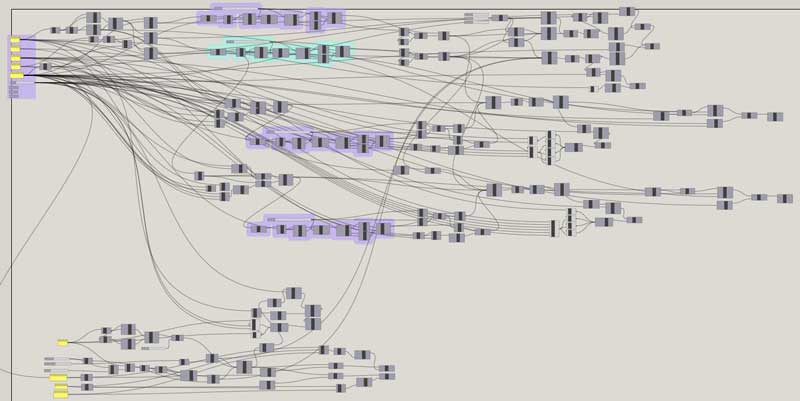
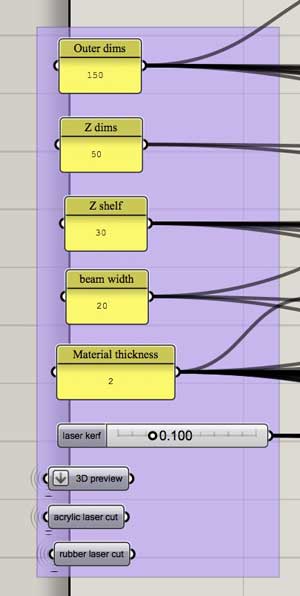
As before, all the important variables and a few others are easily configurable throughout the code.
This shows four cathode bolt holes but there will just be one.
Then I can see a more detailed array of the modules.
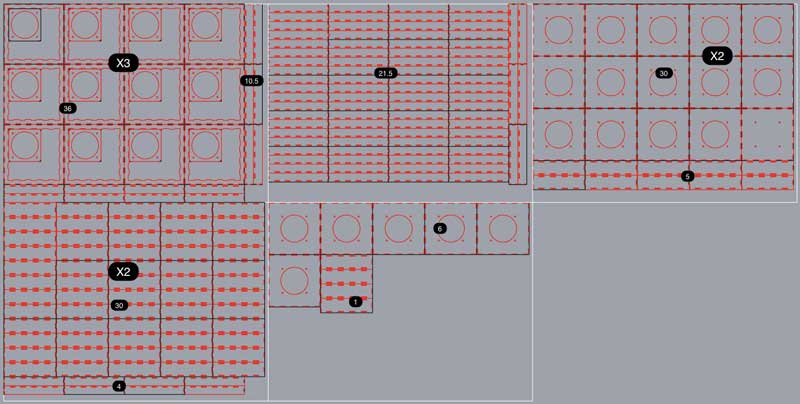
And these are the pieces that need to be cut for one module. Each module is 150mm x 150mm which is larger than the testing modules, which were 100mm x 100mm. The green pieces are rubber, red acrylic.

I roughly laid out the pieces of the modules so I would know how much acrylic I needed. I need 9 sheets at 660mm x 495mm if I want to cut 36 units. However, I may start with 25 which should be less than seven sheets of the same size.
Returning to this aspect of the work, I decided to do a laser kerf test on 2mm acrylic and cut a test box from the file I created a couple days ago.
Power : 100
Speed : 3
PPI : 1000
Laser kerf : 0.086
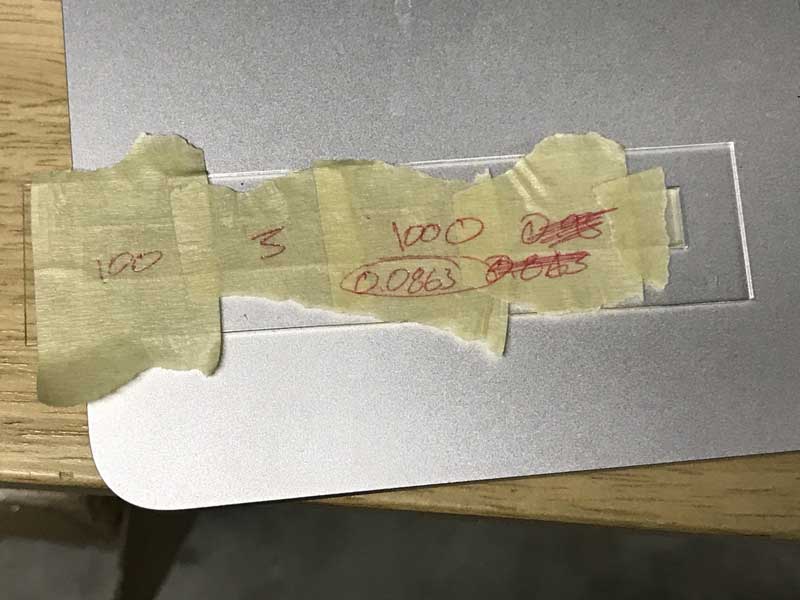
I put the acrylic on a thin layer of used wood, which gives some space for the smoke to exhaust from under the acrylic and effectively reduces the melting of the underside of the acrylic. By now, I feel like I have this parametric laser cutting process down.
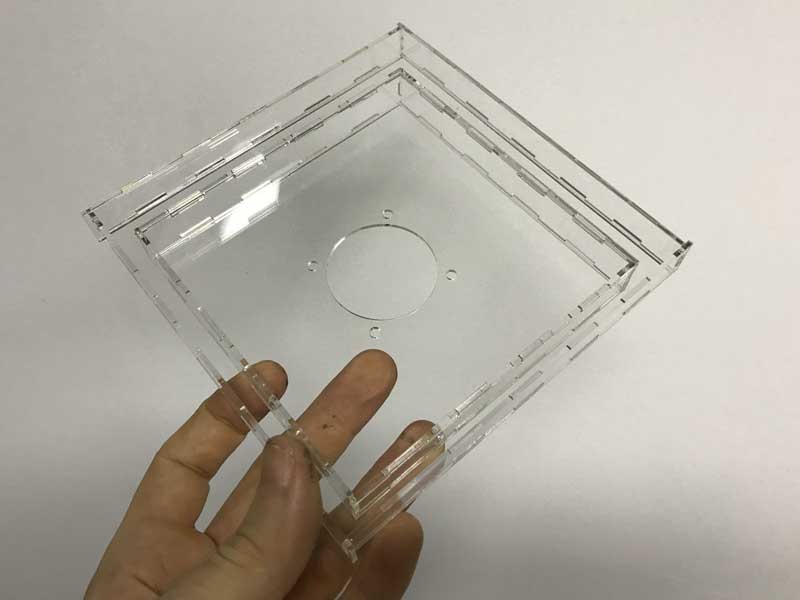
The quality is great, the press fit joints work well, and it sits on a beam structure as expected. Still, it does not fit right with me. While the laser cut method is very fast and low on fabrication effort, this container does not hold water well. I was thinking before fabricating this test, that I would go over all the joints with a sealant, or even a bonding agent. However, after seeing the test and watching Wednesday's review session, this solution does not seem nearly as robust or hands-free as is the conceit of the fab academy. I chose this solution thinking it would give me the best shot to finish the project for the presentation. Then what? I will have a flawed grow module.
With that in mind, I began considering how I may do the same basic module using a molding and casting method. While I do not have nearly the comfort level doing molding and casting projects as I do laser cutting, I do not see this being overly difficult. Once I have the mold, the casting should be a swift process of replication, depending on the material of course, which may be plaster, lightweight concrete, or a clear plastic, all swift curing. I will make that decision tomorrow if Saverio does not talk me out of this.
Moisture retention is critical in helping conduct electricity and providing a most enjoyable environment for the mold's friendly microbes. Casting the project would be highly replicable and solve the water retention issue of press fit joints. I hope to make a two part mold from oomoo with a wood frame for extra stability and alignment redundancy. If not two part, this may be modified to be 4 part or even 8 part with its symmetry. Our machineable wax is not large enough to do a 2 part mold, but could be melted into a larger piece.
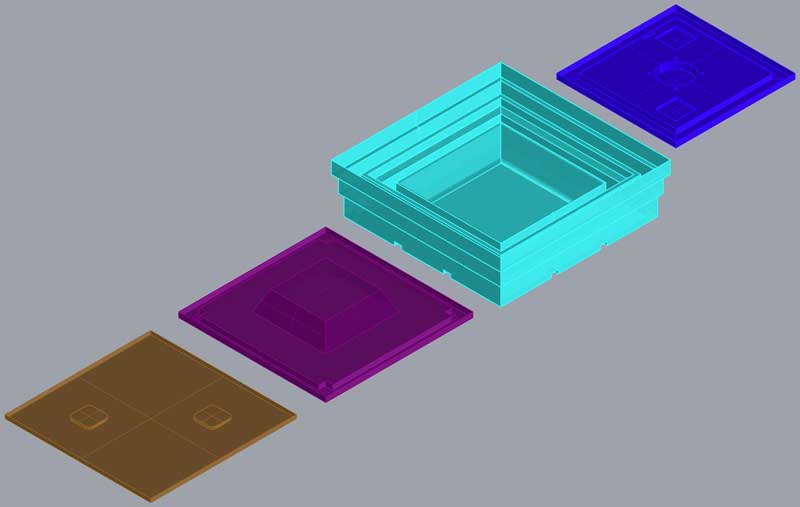
After discussion, we decided that this mold could be done as a single piece, with more complicated milling. I have some milling multiple sides of stock in the past, so why not give it a try? Then casting the concrete will be streamlined.
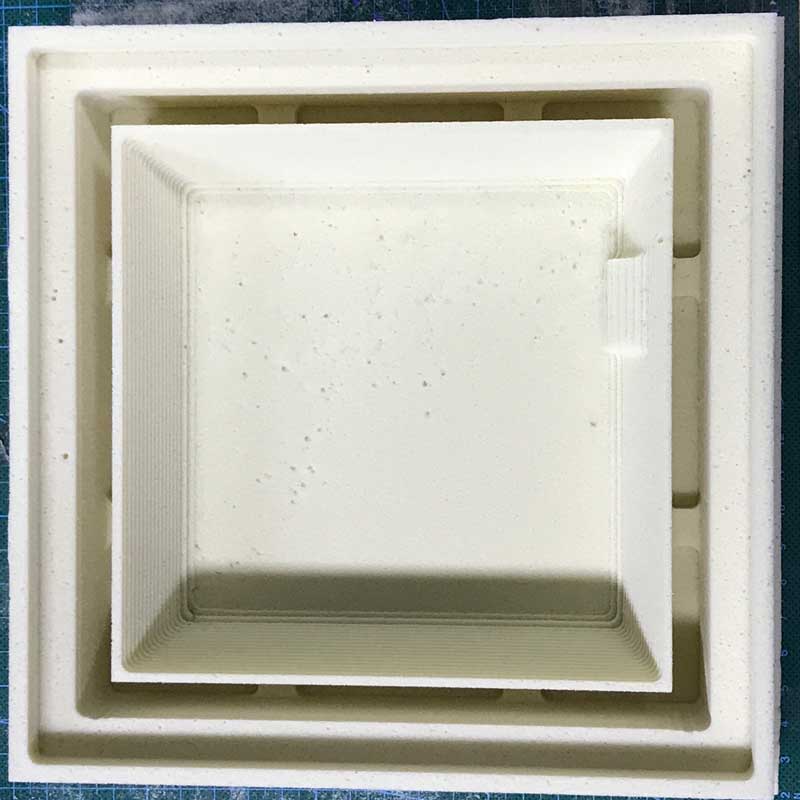
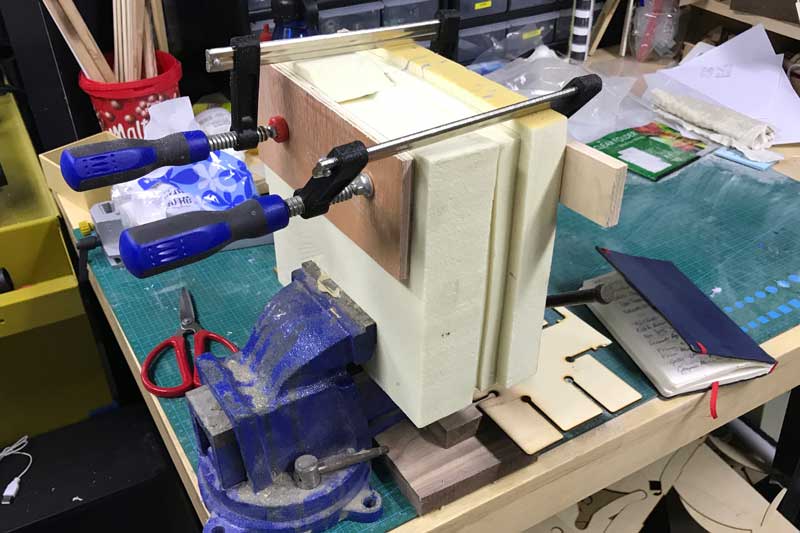
I edited the 3D model for this new type of mold and used a previous flipping mechanism and found some discarded rigid foam outside. While cutting the first version, it shifted during the flip and I did not recognize it. Precious hours go to a tough lesson and I never knew until I flipped it after it was finished.
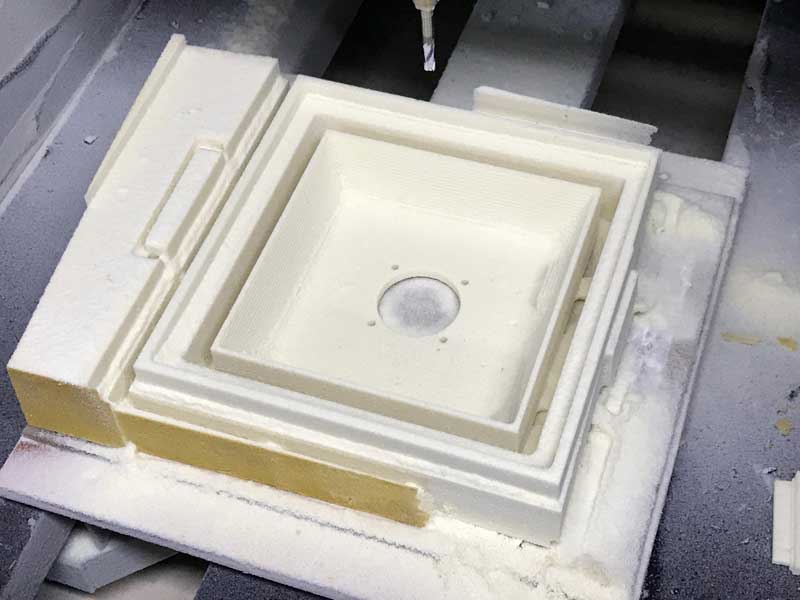
I redesigned the mold so that when it was flipped, it would slot precisely into a four sided jig. I modified the purple piece slightly after having cut that piece. This is why it does not match the proceeding photograph.
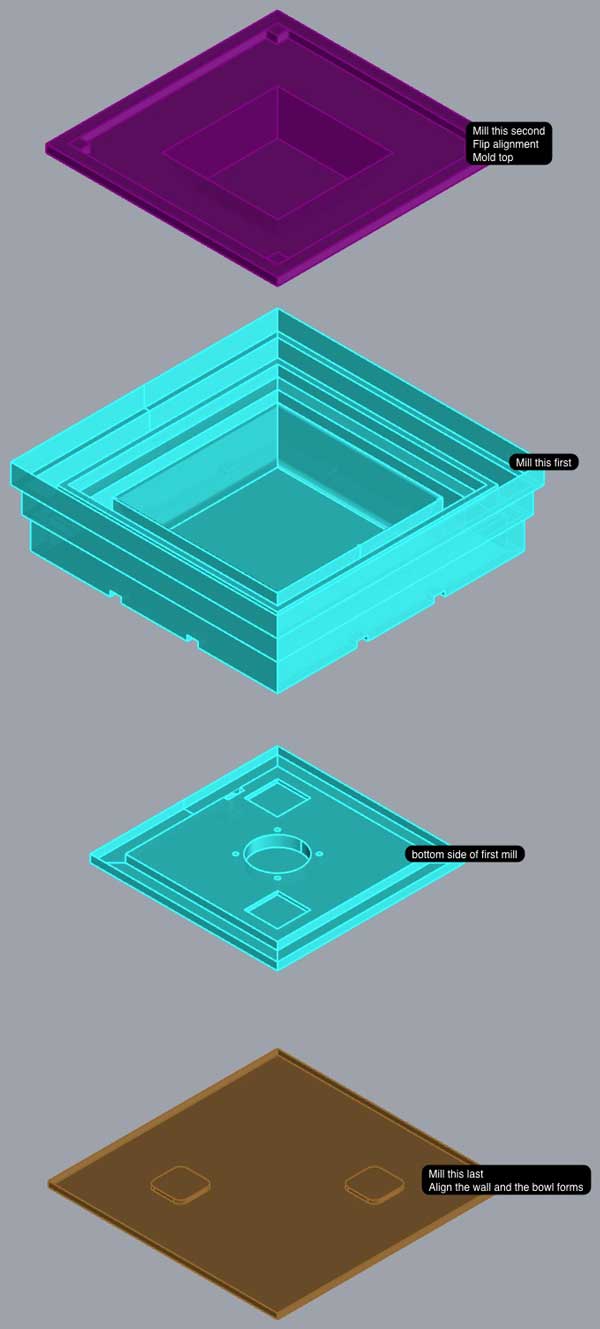
This time the opposite side milled perfectly. I milled an additional piece to hold the two pieces of foam in the correct relationship when casting the silicone mold.
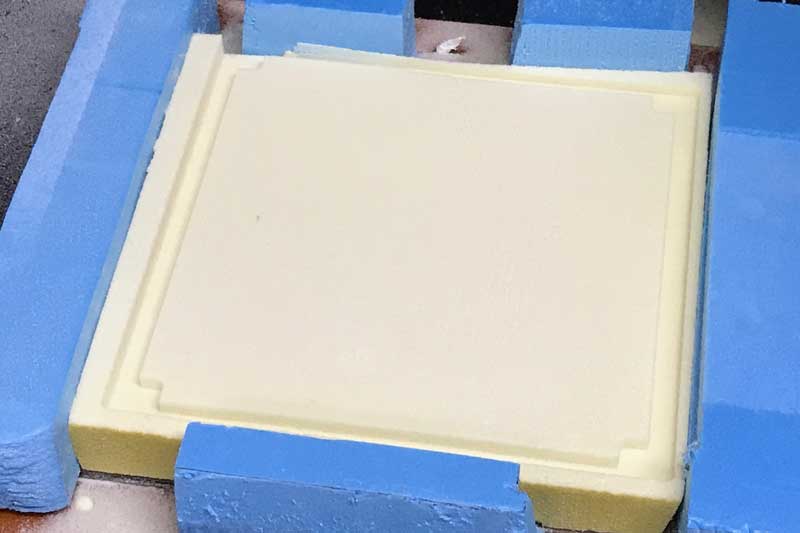
Aside from my careless positioning of the dogbone, the precision between the flips was remarkable the second time.
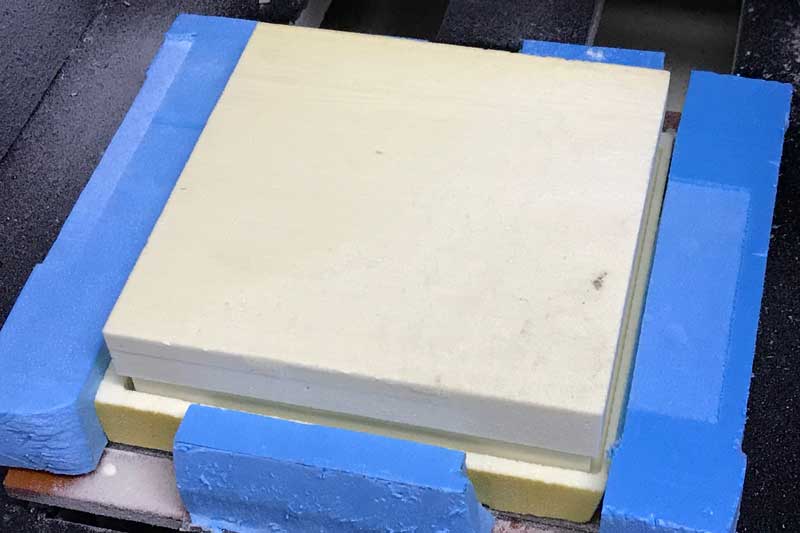
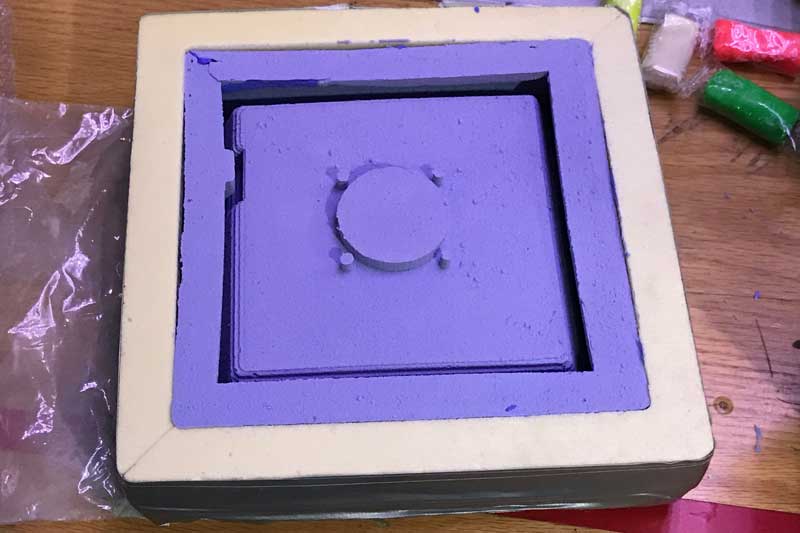
The oomoo was nearly depleted and I forgot to stir it thoroughly before mixing the two parts. It started to get rubbery in minutes while mixing and then was very hard to get into the form. Nonetheless: lockdown.
After carefully taking apart the mold, I found the silicone in decent shape considering some of the difficulty encountered in preparing it. I should have been more careful with double-checking the procedure for preparing Oomoo because it is expensive. Fortunately, this mold is still working well to do this day (post-build), and I have used it at least 20 times with cement thus far.
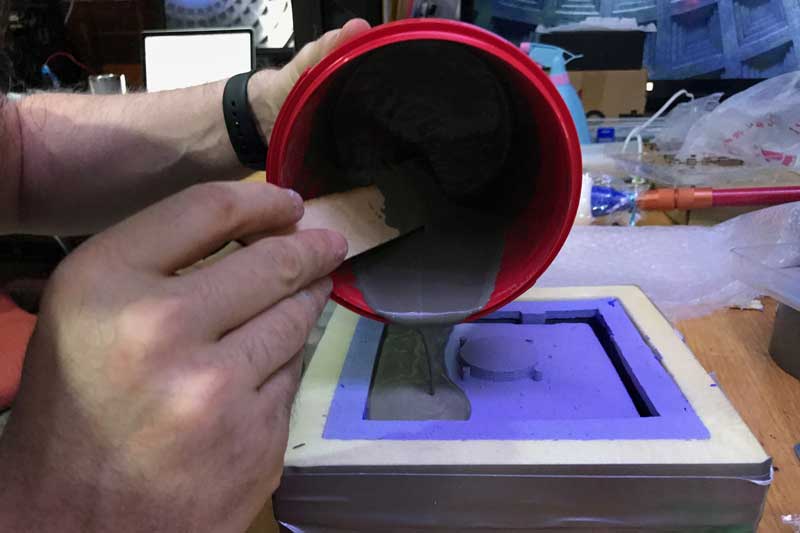
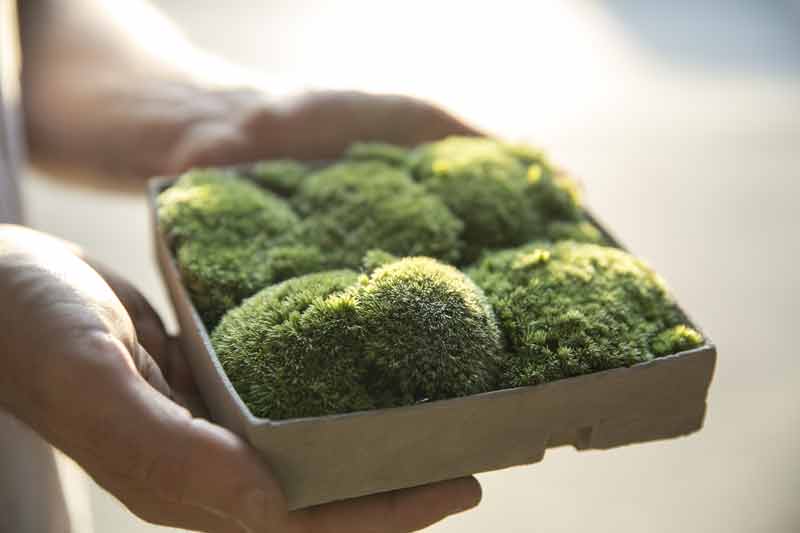
After cleaning up the mold, I cast my first concrete grow module. This is a quick curing cement. The first module, I used 300g of concrete mix and 150g of water with mold release sprayed on the silicone. Mixed thoroughly and it poured in beautifully.
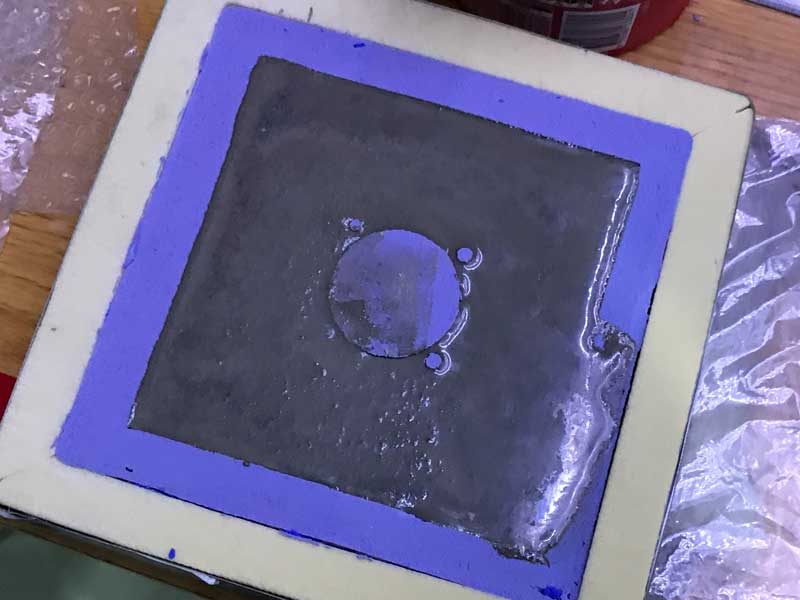
However perfecting the cement mix proved to be one of the more challenging aspects of this work. Currently, I am use a ratio of 3 : 1 : 0.1 : 0.5, cement : gravel : cure accellerant : water. Depending on environmental factors, the cast can be carefully pulled from the mold in 2 - 4 hours, then it will continue to harden significantly for the next couple of days and seemingly more so in the days that follow. After pulling the concrete, I followed effectively the same procedure to assemble the microbial fuel cell. Later I upgraded to a much finer stainless steel.
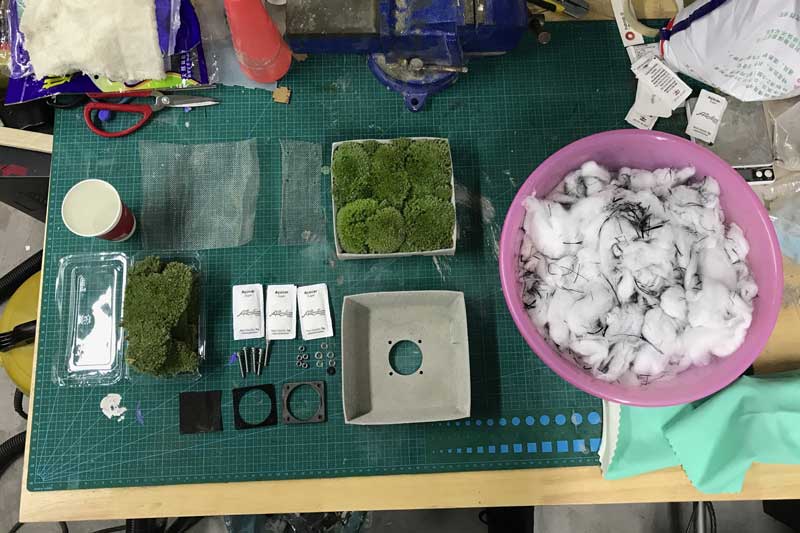
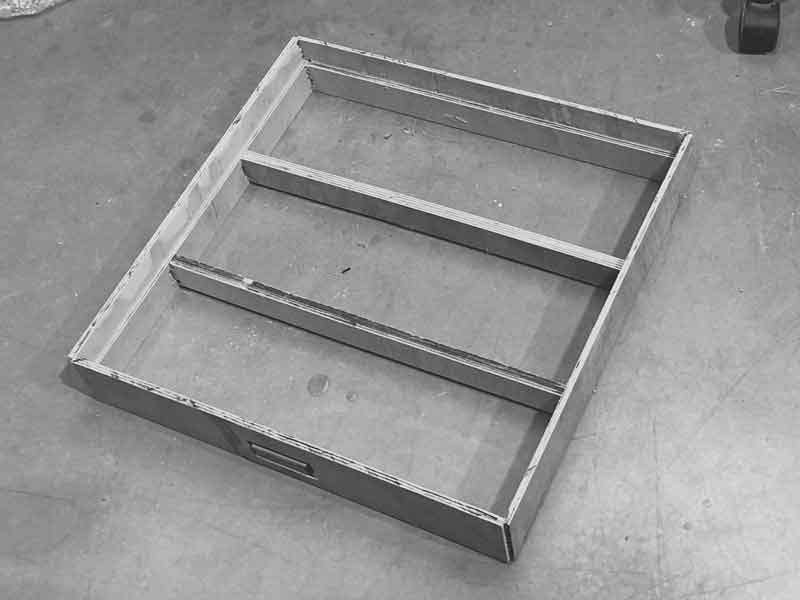
The frame is CNC milled from 14mm plywood. Low grade stuff found in the shop. The joists are limited to a single direction to clear space for wiring under the modules. For more information on the frame build, please refer to this post. Finally, a small pocket was cut for an LCD.
Takeaways : Changing to the concrete cells made the project more robust at the cost of a significant amount of time. I think laser cutting 9 cells would have taken two hours based on the experience of making one. Cutting the foam, waiting for the oomoo to cure, and casting the concrete (many many broken shells in finding the right formula) used easily over 100 hours to get 9 modules. When the cement is wet, water will slowly drip through the walls so it did not completely solve that issue with the laser cut modules. Granted, pouring cement is simple, when the formula is known. Further, the mold had issues beyond the oomoo averted disaster, there was significant flex which fortunately could be made up for in the frame. The walls are not straight. I do not mind it for this prototype because it has a nice quality but in demand of greater precision, I will have to reinforce the mold more and do better with the oomoo casting.
That said, I am happy I went through with the cement casting. I think finding these problems and working through them in a limited amount of time and budget to find a suitable solution is an important experience. Further, I certainly upgraded my technical capabilities with 3D, multi-sided milling, multi-part molds, and casting. Had a followed through with two hours of laser cutting, I doubt I would have learned anything new. Reflecting on my experience these past couple weeks with casting, that would have been a damn shame.
Share this post...
« Previous post :: Fireflies and grasshoppers.
I would like to start with the Firefly plugin in Grasshopper and see if I can control a stepper motor. If I can get a successful start with that, then I might be able to incorporate dishuBot controls through Grasshopper/ Firefly rather than GRBL. This would be directly connected to my G-code transcoder. There are a few challenges. One, Firefly has not been released on the MacOS, my operating system. Two, I need to learn to setup code for the board to accept commands through serial from Firefly. This is an example of Firefly reading and parsing live hand tracking...
Next post :: Grow monitors | What watches the watchers? »
Simultaneous to the module development, I will produce some grow module monitoring equipment. Previously, I worked with a phototransistor sensor, an LCD output and wrote a basic graphical interface for live monitoring the phototransistor readings. Today, my goal is to combine these with voltage sensoring so I can begin tracking the correlation between sunlight and power generation in the bioelectrochemical testing modules. Starting with a little research, I found that by simply connecting an input voltage to an open ADC pin, I could take voltage readings. Duh. I have been doing this for weeks via the phototransistor. I returned to...